×
- Hello
- Login or Register
- Quick Links
- Live Chat
- Track Order
- Parts Availability
- RMA
- Help Center
- Contact Us
- Shop for
- Nissan Parts
- Nissan Accessories

My Garage
My Account
Cart
Genuine Nissan 350Z Flywheel
Clutch Flywheel- Select Vehicle by Model
- Select Vehicle by VIN
Select Vehicle by Model
orMake
Model
Year
Select Vehicle by VIN
For the most accurate results, select vehicle by your VIN (Vehicle Identification Number).
3 Flywheels found
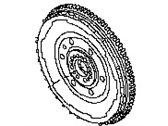
Nissan 350Z FLYWHEEL Assembly
Part Number: 12310-CD001$1376.52 MSRP: $1666.49You Save: $289.97 (18%)Ships in 1-3 Business DaysNissan 350Z FLYWHEEL Assembly
Part Number: 12310-JK20C$1103.52 MSRP: $1558.65You Save: $455.13 (30%)Ships in 1-3 Business DaysNissan 350Z FLYWHEEL Assembly
Part Number: 12310-JK20B$1103.52 MSRP: $1558.65You Save: $455.13 (30%)Ships in 1-3 Business Days
Nissan 350Z Flywheel
If you need any OEM Nissan 350Z Flywheel, feel free to choose them out of our huge selection of genuine Nissan 350Z Flywheel. All our parts are offered at unbeatable prices and are supported by the manufacturer's warranty. In addition, we offer quick shipping to have your parts delivered to your door step in a matter of days.
Nissan 350Z Flywheel Parts Questions & Experts Answers
- Q: How do you properly remove and reinstall a flywheel or driveplate during a Nissan 350Z transmission service?A:Raise the vehicle and securely support it on jackstands, then remove the transmission. For vehicles with a manual transmission, remove the pressure plate and clutch disc, taking the opportunity to check or replace the clutch components and pilot bushing if necessary. For those with an automatic transmission, check and replace the front pump seal or O-ring. Use paint or a center-punch to make alignment marks on the flywheel or driveplate and crankshaft to ensure correct alignment during reinstallation. Remove the bolts securing the flywheel or driveplate to the crankshaft, holding the driveplate in place with a lever or screwdriver to prevent it from turning. If the crankshaft rotates, use a pry bar or wedge a screwdriver into the ring gear teeth to jam the flywheel. Carefully remove the flywheel or driveplate, supporting it while removing the last bolt due to its weight. Clean the flywheel to remove grease and oil, inspecting the surface for cracks, rivet grooves, burned areas, and score marks, with light scoring removable using emery cloth. Check for cracked or broken ring gear teeth and ensure the flywheel is flat by using a straightedge. Clean and inspect the mating surfaces of the flywheel or driveplate and crankshaft, replacing the crankshaft rear seal if it is leaking before reinstalling. Position the flywheel or driveplate against the crankshaft, aligning the marks made during removal, and apply thread locking compound to the bolt threads before installation. Wedge a screwdriver into the ring gear teeth to prevent the flywheel or driveplate from turning while tightening the bolts to the specified torque. The remainder of the installation follows the reverse order of removal.


