×
- Live Chat
- 1-888-726-6993
My Garage
My Account
Cart
Genuine Nissan Armada Engine Mount
Engine Motor Mount- Select Vehicle by Model
- Select Vehicle by VIN
Select Vehicle by Model
orMake
Model
Year
Select Vehicle by VIN
For the most accurate results, select vehicle by your VIN (Vehicle Identification Number).
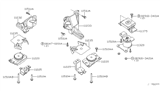
18 Engine Mounts found
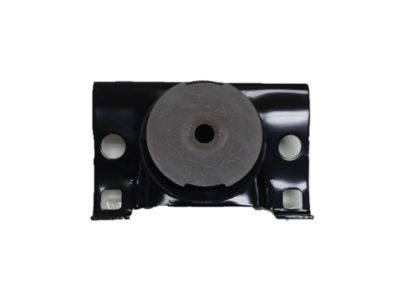
Nissan Armada Engine Mounting Insulator ,Front
Part Number: 11220-7S000$209.14 MSRP: $318.12You Save: $108.98 (35%)Ships in 1-3 Business Days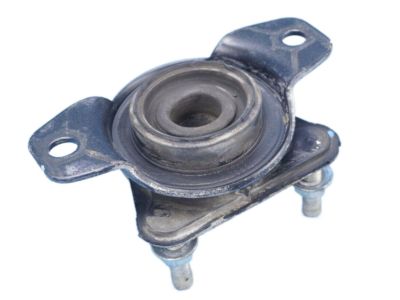
Nissan Armada Engine Mounting Insulator, Rear
Part Number: 11320-ZZ50A$138.85 MSRP: $211.20You Save: $72.35 (35%)Ships in 1-2 Business Days
Nissan Armada Engine Mounting, Rear
Part Number: 11320-7S100$138.85 MSRP: $211.20You Save: $72.35 (35%)Ships in 1-3 Business Days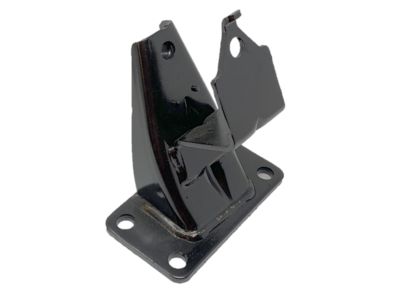
Nissan Armada Front Engine Mount Bracket,Right
Part Number: 11232-ZV00A$120.94 MSRP: $166.58You Save: $45.64 (28%)Ships in 1-3 Business Days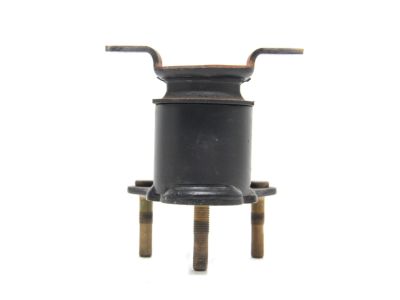
Nissan Armada Engine Mounting Insulator ,Rear
Part Number: 11320-7S000$129.96 MSRP: $197.68You Save: $67.72 (35%)Ships in 1-3 Business Days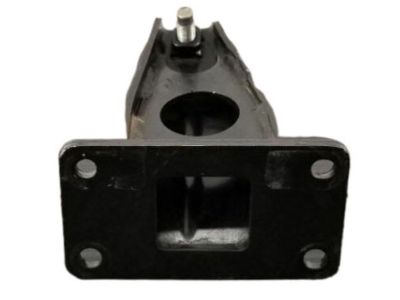
Nissan Armada Engine Mounting Bracket, Right
Part Number: 11232-7S000$49.40 MSRP: $68.05You Save: $18.65 (28%)Ships in 1-3 Business Days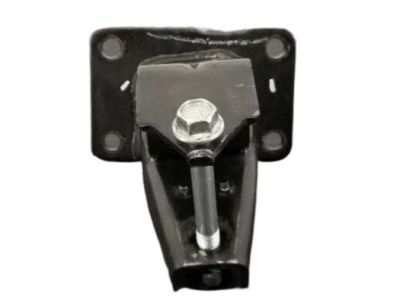
Nissan Armada Engine Mount Bracket, Left
Part Number: 11233-7S000$49.40 MSRP: $68.05You Save: $18.65 (28%)Ships in 1-3 Business Days
Nissan Armada Engine Mounting Insulator Assembly, Front Right
Part Number: 11210-5ZM0A$169.69 MSRP: $245.50You Save: $75.81 (31%)
Nissan Armada Engine Mounting Insulator ,Front
Part Number: 11220-5ZM0A$240.71 MSRP: $366.15You Save: $125.44 (35%)Ships in 1-3 Business Days
Nissan Armada Engine Mounting Insulator, Rear
Part Number: 11320-ZZ50B$129.96 MSRP: $197.68You Save: $67.72 (35%)Ships in 1-3 Business Days
Nissan Armada Engine Mounting Insulator, Rear
Part Number: 11320-1LA1A$387.59 MSRP: $594.22You Save: $206.63 (35%)Ships in 1-3 Business Days
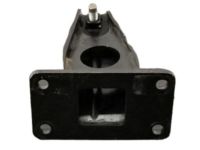
Nissan Armada Engine Mounting Bracket
Part Number: 50310-1LA0A$83.64 MSRP: $125.67You Save: $42.03 (34%)Ships in 1-3 Business DaysNissan Armada Engine Mounting Insulator, Rear
Part Number: 11320-1LD0A$354.81 MSRP: $543.97You Save: $189.16 (35%)Ships in 1-3 Business Days
Nissan Armada Engine Mounting Support, Front
Part Number: 11252-5ZM0A$134.84 MSRP: $185.73You Save: $50.89 (28%)Ships in 1-3 Business Days
Nissan Armada Engine Mounting Bracket Assembly, Right
Part Number: 50310-7S030$88.88 MSRP: $133.55You Save: $44.67 (34%)Ships in 1-2 Business Days
Nissan Armada Engine Mounting Bracket Assembly, Left
Part Number: 50311-7S030$88.87 MSRP: $133.55You Save: $44.68 (34%)Ships in 1-3 Business Days
Nissan Armada Engine Mounting Bracket Assembly, Left
Part Number: 50311-1LA0A$104.02 MSRP: $156.31You Save: $52.29 (34%)Ships in 1-3 Business Days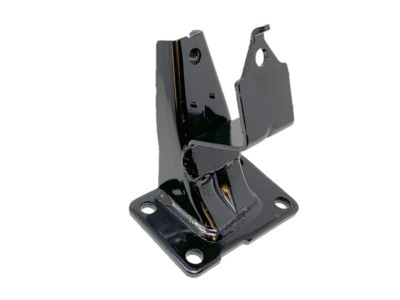
Nissan Armada Engine Mounting Bracket, Left
Part Number: 11233-ZV00A$79.04 MSRP: $108.87You Save: $29.83 (28%)
Nissan Armada Engine Mount
If you need any OEM Nissan Armada Engine Mount, feel free to choose them out of our huge selection of genuine Nissan Armada Engine Mount. All our parts are offered at unbeatable prices and are supported by the manufacturer's warranty. In addition, we offer quick shipping to have your parts delivered to your door step in a matter of days.
Nissan Armada Engine Mount Parts Questions & Experts Answers
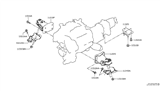
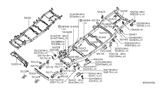
- Q: How are engine and transmission mounts installed and checked on Nissan Armada?A: There are two engine mounts and one transmission mount installed on the vehicles, with the engine mounts located on the passenger and driver's side, attached to the engine block and each frame rail, while the transmission mount is positioned at the rear of the transmission and the transmission crossmember. To check the mounts, the engine must be raised slightly to remove the weight from them, and the vehicle should be securely supported on jackstands, with the engine/transmission supported from above using a hoist or three-bar support fixture. Inspect the mounts for any cracks, hardening, or separation of the rubber from the bushing, and check for relative movement between the mounts and the engine or frame, using a large screwdriver or prybar; if movement is detected, lower the engine and tighten the mount fasteners. For replacement, disconnect the cable from the negative terminal of the battery, set the parking brake, and block the rear wheels. Raise the front of the vehicle and support it securely on jackstands, then remove the splash shields from underneath. With the engine supported from above, raise it just enough to relieve the weight on the mounts, then remove the engine mount insulator bolt and the engine mount bracket bolts from below. In the engine compartment, remove the two upper engine mount insulator-to-frame bolts, noting that removing the air filter housing can facilitate access to the left side bolts. Installation follows the reverse order of removal, ensuring the metal heat shield is in place between the insulator and the engine bracket, applying thread locking compound to the mount nuts before installation, and tightening them to the specified torque.
Related Nissan Armada Parts

Browse by Year
2023 Engine Mount 2022 Engine Mount 2021 Engine Mount 2020 Engine Mount 2019 Engine Mount 2018 Engine Mount 2017 Engine Mount 2015 Engine Mount 2014 Engine Mount 2013 Engine Mount 2012 Engine Mount 2011 Engine Mount 2010 Engine Mount 2009 Engine Mount 2008 Engine Mount 2007 Engine Mount 2006 Engine Mount 2005 Engine Mount 2004 Engine Mount