×
- Live Chat
- 1-888-726-6993

My Garage
My Account
Cart
Genuine Nissan Juke Brake Caliper
Caliper- Select Vehicle by Model
- Select Vehicle by VIN
Select Vehicle by Model
orMake
Model
Year
Select Vehicle by VIN
For the most accurate results, select vehicle by your VIN (Vehicle Identification Number).
10 Brake Calipers found
Nissan Juke Brake-Rear LH
Part Number: 44011-1KD0A$271.42 MSRP: $413.85You Save: $142.43 (35%)Ships in 1-3 Business DaysNissan Juke CALIPER Assembly-Rear RH,W/O Pads Or SHIMS
Part Number: 44001-1KD0A$302.96 MSRP: $462.20You Save: $159.24 (35%)Ships in 1-3 Business DaysNissan Juke CALIPER Assembly-Front LH, W/O Pads Or SHIMS
Part Number: 41011-3YW0A$331.76 MSRP: $481.62You Save: $149.86 (32%)Ships in 1-3 Business DaysNissan Juke Brake-Rear LH
Part Number: 44011-4FA0A$216.81 MSRP: $311.55You Save: $94.74 (31%)Ships in 1-3 Business DaysNissan Juke CALIPER Assembly-Rear RH,W/O Pads Or SHIMS
Part Number: 44001-4FA0A$289.57 MSRP: $420.10You Save: $130.53 (32%)Ships in 1-3 Business DaysNissan Juke CALIPER Assembly-Front RH, W/O Pads Or SHIMS
Part Number: 41001-3YW0A$331.76 MSRP: $481.62You Save: $149.86 (32%)Ships in 1-3 Business DaysNissan Juke Brake-Rear LH
Part Number: 44011-3YW0A$703.19 MSRP: $1025.35You Save: $322.16 (32%)Ships in 1-3 Business DaysNissan Juke CALIPER Assembly-Rear RH,W/O Pads Or SHIMS
Part Number: 44001-3YW0A$804.11 MSRP: $1172.52You Save: $368.41 (32%)Ships in 1-3 Business DaysNissan Juke CALIPER Assembly-Front RH, W/O Pads Or SHIMS
Part Number: 41001-JN00A$247.26 MSRP: $373.87You Save: $126.61 (34%)Ships in 1-3 Business DaysNissan Juke CALIPER Assembly-Front LH, W/O Pads Or SHIMS
Part Number: 41011-JN00A$247.26 MSRP: $373.87You Save: $126.61 (34%)Ships in 1-3 Business Days
Nissan Juke Brake Caliper
If you need any OEM Nissan Juke Brake Caliper, feel free to choose them out of our huge selection of genuine Nissan Juke Brake Caliper. All our parts are offered at unbeatable prices and are supported by the manufacturer's warranty. In addition, we offer quick shipping to have your parts delivered to your door step in a matter of days.
Nissan Juke Brake Caliper Parts Questions & Experts Answers
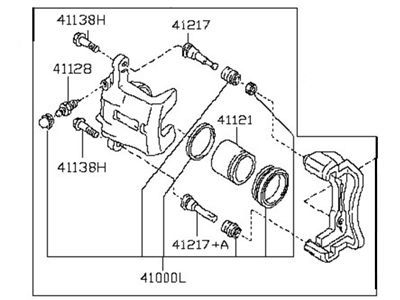
- Q: How do you remove and overhaul a front brake caliper on Nissan Juke?A: Before you release the brake caliper, put on the handbrake, raise the front part of the vehicle, and properly place the axle stands beneath it to take the weight off the wheels; then, and only then, should you take off the suitable front roadwheel which is akin to a wheel hub. Reducing fluid loss; one should remove the master cylinder reservoir cap and cover it with polythene or fix the flexible hose to the caliper. Remove dirty material around the fluid hose union on the caliper, thereafter, remove the hose union banjo bolt and retrieve the two sealing washers but ensure that the opened ends are shielded from access by dirt materials. The brake pads should be pulled out, the bolt of the upper guide pin of the caliper should be loosened and the caliper should be taken out of the mounting bracket. If required remove this and that bolt which connect the caliper mounting bracket to the hub carrier. For the overhaul, see the local dealer parts book for availability, get the right caliper overhaul kit. Use the alcohol to clean the caliper, and take out the guide pins of the caliper, remove the rubber cover too. Put a small piece of wood, and take off the piston with the help of low-pressure air through the caliper body. Remove the dust seal and take out the piston seal from the caliper cylinder bore properly. Thoroughly wipe clean all of the parts with methylated spirit or clean hydraulic fluid, excluding those based on minerals. The old piston seal, dust seal, guide pin dust covers and the bleed nipple dust cap should be taken off and new ones fitted when assembling the part. Check all the components for its wear and tear, especially, the cylinder bore and piston are not scratched or corroded. Superficial imperfections can easily be filed off but if defects are exhibited by the piston then it has to be replaced. Ensure all these threads on the caliper body and mounting bracket are okay, guide pins should not be damaged and should fit well. To remove fluid passages of the vehicle, you should use compressed air; see to it that all components are clean and free from moisture when assembled. Immerse the new piston seal in clean hydraulic fluid to be used in the equipment and fit the new dust seal before pressing the piston into the cylinder against the new piston seal fixed in the cylinder bore groove. Replace each of the guide pins with the new rubber dust covers by applying brake greases in the process. For refitting, carry out the following operations: fixing the caliper mounting bracket to the hub carrier by using bolts to tighten them; positioning the caliper; fitted the upper guide pin bolt, and tighten it. Replace the brake pads, and make sure the caliper glides freely along the mounting bracket. Inspect positioning of the hydraulic fluid hose, connect the union to the caliper using new sealing washers, and then tighten the banjo bolt on the end of the union. Take off the polythene or the clamp at the master cylinder reservoir cap, open the hydraulic fluid circuit and push the break pedal to its normal pressure. Last but not the least, fit the road wheel properly and then remove the jack and lower the vehicle.


