×
- Live Chat
- 1-888-726-6993
My Garage
My Account
Cart
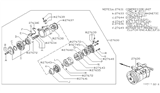
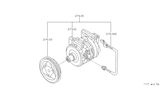
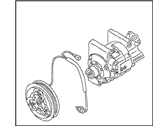
Genuine Nissan Sentra A/C Compressor
Air Conditioning Compressor- Select Vehicle by Model
- Select Vehicle by VIN
Select Vehicle by Model
orMake
Model
Year
Select Vehicle by VIN
For the most accurate results, select vehicle by your VIN (Vehicle Identification Number).
56 A/C Compressors found


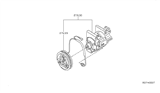
Nissan Sentra Compressor-Air Conditioner
Part Number: 92600-3SH1C$604.41 MSRP: $926.62You Save: $322.21 (35%)Ships in 1-2 Business Days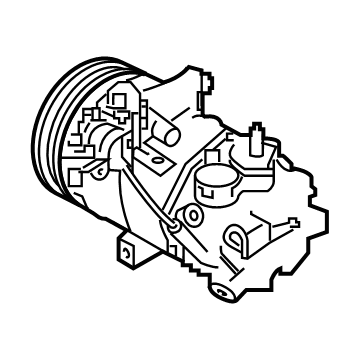

Nissan Sentra Compressor-Air Conditioner
Part Number: 92600-6LB0A$647.87 MSRP: $993.25You Save: $345.38 (35%)Ships in 1-3 Business Days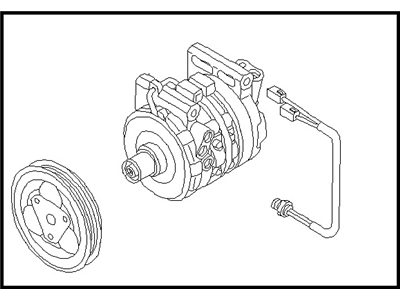

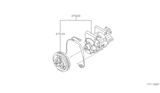
Nissan Sentra Compressor-Cooler
Part Number: 92600-8B700$506.76 MSRP: $642.98Limited AvailabilityYou Save: $136.22 (22%)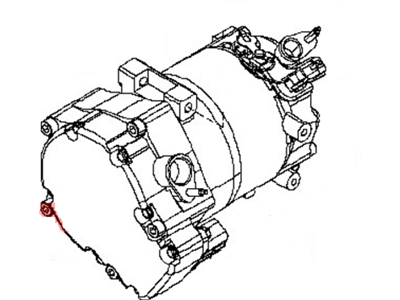
Nissan Sentra Compressor-Air Conditioner
Part Number: 92600-3SH1A$604.41 MSRP: $926.62You Save: $322.21 (35%)Ships in 1-2 Business DaysNissan Sentra Compressor-Air Conditioner
Part Number: 92600-4FU1A$604.41 MSRP: $926.62You Save: $322.21 (35%)Ships in 1-3 Business DaysNissan Sentra Compressor-Air Conditioner
Part Number: 92600-6LX0A$647.87 MSRP: $993.25You Save: $345.38 (35%)Ships in 1-3 Business DaysNissan Sentra Compressor-Air Conditioner
Part Number: 92600-3SH0A$604.41 MSRP: $926.62You Save: $322.21 (35%)Ships in 1-3 Business DaysNissan Sentra Compressor-Air Conditioner
Part Number: 92600-3SH1B$604.41 MSRP: $926.62You Save: $322.21 (35%)Ships in 1-3 Business Days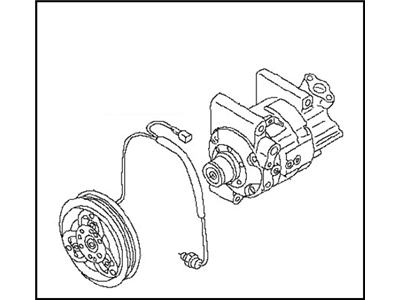
Nissan Sentra Compressor - Cooler
Part Number: 92600-ZE90B$667.33 MSRP: $885.85You Save: $218.52 (25%)Ships in 1-2 Business Days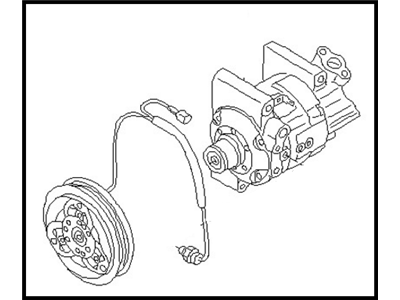
Nissan Sentra Compressor - Cooler
Part Number: 92600-8J02A$542.55 MSRP: $688.49Limited AvailabilityYou Save: $145.94 (22%)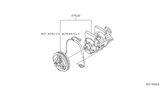
Nissan Sentra Compressor - Cooler
Part Number: 92600-9AF0A$581.85 MSRP: $892.03You Save: $310.18 (35%)Ships in 1-3 Business DaysNissan Sentra Compressor-Cooler
Part Number: 92600-4Z002$720.00 MSRP: $1000.00You Save: $280.00 (28%)Ships in 1-3 Business Days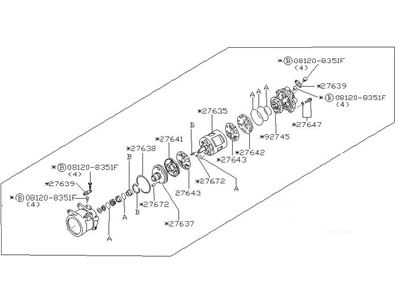
Nissan Sentra Compressor Unit
Part Number: 92640-21L90$342.90 MSRP: $457.08Limited AvailabilityYou Save: $114.18 (25%)Nissan Sentra Compressor-Cooler
Part Number: 92600-8J000$542.55 MSRP: $688.49Limited AvailabilityYou Save: $145.94 (22%)Nissan Sentra Compressor - Cooler
Part Number: 92600-ZE80B$581.85 MSRP: $892.03You Save: $310.18 (35%)Ships in 1-3 Business Days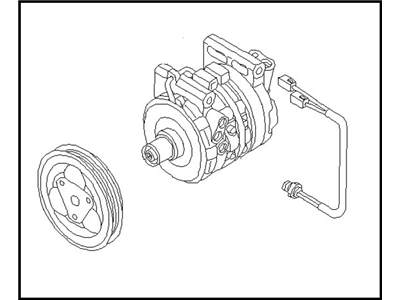
Nissan Sentra Compressor Cooler
Part Number: 92600-69Y00$551.69 MSRP: $701.45Limited AvailabilityYou Save: $149.76 (22%)Nissan Sentra Compressor Cooler
Part Number: 92600-8B760$506.76 MSRP: $642.98Limited AvailabilityYou Save: $136.22 (22%)Nissan Sentra Compressor - Cooler
Part Number: 92600-ZE81B$581.85 MSRP: $892.03You Save: $310.18 (35%)Ships in 1-3 Business DaysNissan Sentra Compressor Cooler
Part Number: 92600-4Z001$720.00 MSRP: $1000.00You Save: $280.00 (28%)Nissan Sentra Compressor - Cooler
Part Number: 92600-4Z02A$720.00 MSRP: $1000.00You Save: $280.00 (28%)Ships in 1-3 Business Days
| Page 1 of 3 |Next >
1-20 of 56 Results
Nissan Sentra A/C Compressor
If you need any OEM Nissan Sentra A/C Compressor, feel free to choose them out of our huge selection of genuine Nissan Sentra A/C Compressor. All our parts are offered at unbeatable prices and are supported by the manufacturer's warranty. In addition, we offer quick shipping to have your parts delivered to your door step in a matter of days.
Nissan Sentra A/C Compressor Parts Questions & Experts Answers
- Q: How to remove and install an automotive air conditioning compressor on Nissan Sentra?A: Have the refrigerant discharged at a dealer service department or an automotive air conditioning repair facility. Disconnect the cable from the negative terminal of the battery. Loosen the right front wheel lug nuts. Raise the vehicle and support it securely on jackstands. Remove the right inner fender splash shield. Remove the splash guard underneath the engine. Remove the fresh air intake duct. For 2.5L engines, drain the cooling system. If the coolant is relatively new, or is in good condition, save it and re-use it. Disconnect the upper radiator hose from the radiator. Disconnect the overflow hose from the fitting by the radiator cap. Remove the drivebelt and, on 2.5L engines, remove the alternator. Disconnect the electrical connector from the air conditioning compressor. Remove the fasteners holding the hose and pipe terminals to the air conditioning compressor. Disconnect all refrigerant lines from the compressor. Note: Plug all open fittings to prevent entry of dirt and moisture into the lines. Remove the compressor mounting bolts and remove the compressor from the engine compartment. Note: If a new compressor is being installed, the clutch assembly may have to be transferred to the new compressor. The removal of the clutch assembly will require the use of several special tools; this procedure should be performed by an air conditioning shop or dealer service department. Installation is the reverse of removal. Tighten the compressor mounting bolts to the torque value. Note: Do not use old O-rings for the refrigerant lines, replace them with new ones and apply compressor oil to them before installation. Reconnect the battery and perform the necessary re-learn procedures. Have the system evacuated, charged and leak tested by the shop that discharged it.
Related Nissan Sentra Parts
 Nissan Sentra Blower Motor Resistor
 Nissan Sentra Blend Door Actuator
 Nissan Sentra Blower Motor
 Nissan Sentra Evaporator
 Nissan Sentra A/C Idler Pulley
 Nissan Sentra A/C Switch
 Nissan Sentra A/C Expansion Valve
 Nissan Sentra A/C Hose
 Nissan Sentra A/C Clutch
 Nissan Sentra A/C Condenser Fan
 Nissan Sentra A/C Accumulator
Browse by Year
2024 A/C Compressor 2023 A/C Compressor 2022 A/C Compressor 2021 A/C Compressor 2020 A/C Compressor 2019 A/C Compressor 2018 A/C Compressor 2017 A/C Compressor 2016 A/C Compressor 2015 A/C Compressor 2014 A/C Compressor 2013 A/C Compressor 2012 A/C Compressor 2011 A/C Compressor 2010 A/C Compressor 2009 A/C Compressor 2008 A/C Compressor 2007 A/C Compressor 2006 A/C Compressor 2005 A/C Compressor 2004 A/C Compressor 2003 A/C Compressor 2002 A/C Compressor 2001 A/C Compressor 2000 A/C Compressor 1999 A/C Compressor 1998 A/C Compressor 1997 A/C Compressor 1996 A/C Compressor 1995 A/C Compressor 1994 A/C Compressor 1993 A/C Compressor 1992 A/C Compressor 1991 A/C Compressor 1990 A/C Compressor 1989 A/C Compressor 1988 A/C Compressor 1987 A/C Compressor 1986 A/C Compressor 1985 A/C Compressor 1984 A/C Compressor 1983 A/C Compressor 1982 A/C Compressor