×
- Live Chat
- 1-888-726-6993

My Garage
My Account
Cart
Genuine Nissan Sentra Crankshaft
Crank Shaft- Select Vehicle by Model
- Select Vehicle by VIN
Select Vehicle by Model
orMake
Model
Year
Select Vehicle by VIN
For the most accurate results, select vehicle by your VIN (Vehicle Identification Number).
24 Crankshafts found
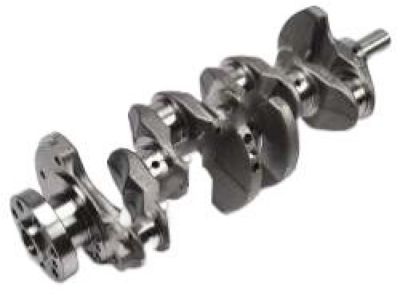
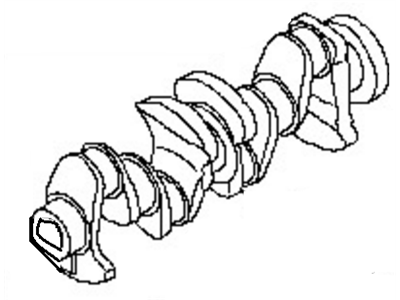
Nissan Sentra CANKSHAFT Assembly
Part Number: 12201-JA02A$1292.64 MSRP: $1538.86You Save: $246.22 (16%)Ships in 1-3 Business DaysNissan Sentra CRANKSHAFT Assembly
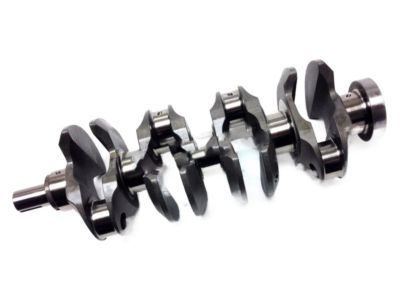
Part Number: 12200-EN210$302.66 MSRP: $416.88You Save: $114.22 (28%)Nissan Sentra CRANKSHAFT Assembly
Part Number: 12200-60J10$755.36 MSRP: $1049.12You Save: $293.76 (28%)Ships in 1-2 Business DaysNissan Sentra CRANKSHAFT Assembly
Part Number: 12200-60J00$755.36 MSRP: $1049.12You Save: $293.76 (28%)Nissan Sentra CRANKSHAFT Assembly
Part Number: 12201-1VA0A$1217.88 MSRP: $1449.86You Save: $231.98 (16%)Ships in 1-3 Business DaysNissan Sentra CRANKSHAFT Assembly
Part Number: 12200-EN20A$302.66 MSRP: $416.88You Save: $114.22 (28%)Ships in 1-3 Business DaysNissan Sentra CRANKSHAFT Assembly
Part Number: 12201-1KC0A$1190.53 MSRP: $1653.52You Save: $462.99 (28%)Ships in 1-3 Business DaysNissan Sentra CRANKSHAFT Assembly
Part Number: 12201-4M525$357.98 MSRP: $477.18Limited AvailabilityYou Save: $119.20 (25%)Nissan Sentra CRANKSHAFT Assembly
Part Number: 12201-6LB0A$526.42 MSRP: $725.10You Save: $198.68 (28%)Ships in 1-3 Business DaysNissan Sentra CRANKSHAFT
Part Number: 12201-11M00$676.80 MSRP: $860.52Limited AvailabilityYou Save: $183.72 (22%)Nissan Sentra CRANKSHAFT
Part Number: 12201-11M01$676.80 MSRP: $860.52Limited AvailabilityYou Save: $183.72 (22%)Nissan Sentra CRANKSHAFT Assembly
Part Number: 12200-1VA0A$1217.88 MSRP: $1449.86You Save: $231.98 (16%)Ships in 1-3 Business Days
| Page 1 of 2 |Next >
1-20 of 24 Results
Nissan Sentra Crankshaft
If you need any OEM Nissan Sentra Crankshaft, feel free to choose them out of our huge selection of genuine Nissan Sentra Crankshaft. All our parts are offered at unbeatable prices and are supported by the manufacturer's warranty. In addition, we offer quick shipping to have your parts delivered to your door step in a matter of days.
Nissan Sentra Crankshaft Parts Questions & Experts Answers
- Q: How can the crankshaft be removed from the engine after it has been taken out of the Nissan Sentra?A: This removal is possible when the engine has first been pulled off the car and if at least the following parts have been removed; the flywheel, crankshaft pulley, timing chain, crankshaft sump, balance shaft, oil filter, and piston/connecting rod assemblies. First of all, to check the amount of the crankshaft endplay loosen the crankshaft sprocket nuts and place the dial gauge parallel to the crankshaft. Pull the crankshaft to the rear and get the zero on the indicator, then move the crankshaft to the front to take the reading, which should normally range from 0.003 to 0.010 inch (0.076 to 0.254 mm). If the endplay is above this range, then there is possibility that the thrust washer bearing assembly has worn out. If there is no wear observed, new main bearings should solve the problem. In case where a dial indicator cannot be used feeler gauge can be used to determine of the clearance required. Slowly unscrew the main bearing cap bolts until you can remove them by hand, this should be done with new bolts because the old bolts should not be reused. Simply use a soft-faced hammer and give the main bearing caps light knocks to remove them off the cylinder block and do not lose the bearing inserts. Bring up the crankshaft out of the engine , probably with help since it is quite heavy. Place the main bearing cap assembly back on the engine block, ensure the arrow points towards the front. For installation, it requires the engine block and the crankshaft to be clean and-checked. Turn the block with the bottom up, uninstall the main bearing cap assembly, and clean the bearing seats. Install the new upper main bearing inserts in the block and the new lower inserts in the main bearing cap with due regard to the oil holes positions. Scrape and wire the bearing faces and crankshaft journals you want in line and put the crankshaft in place; the thrust washers should be placed on the journal #3. This need to be checked using Plastigage and be within the stipulated range of the main bearing oil clearance. If the clearance is wrong, check the clean area and if needed check for different bearing sizes. Any residue from the Plastigage should be wiped off the journals, as well as the bearing faces. Once you are ready for final fitting, scrub the bearing insert faces in the block, coat it with a thin layer of oil and then place the crankshaft back on. Wipe the bearing insert faces with a clean, dry cloth and apply the lubricant and fit the thrust washers so that the groove is positioned on the outside. For 2.5L engines, coat the RTV sealant around the bed plate sealing area Before fitting the main bearing caps or bedplate to the crank-shaft and block. Wipe clean the threads of the block and apply the engine oil to the threads before tightening the bolts in a gradually, tightening each of them to the required torque in turn. Recheck the crankshaft end play and rotate the crankshaft while inserting some force allowing it to rotate with ease with a running torque of 50 in-lbs or less. Last but not the least; fit a new rear main oil seal.
Related Nissan Sentra Parts
Browse by Year
2023 Crankshaft 2022 Crankshaft 2021 Crankshaft 2020 Crankshaft 2019 Crankshaft 2018 Crankshaft 2017 Crankshaft 2016 Crankshaft 2015 Crankshaft 2014 Crankshaft 2013 Crankshaft 2012 Crankshaft 2011 Crankshaft 2010 Crankshaft 2009 Crankshaft 2008 Crankshaft 2007 Crankshaft 2006 Crankshaft 2005 Crankshaft 2004 Crankshaft 2003 Crankshaft 2002 Crankshaft 2001 Crankshaft 2000 Crankshaft 1999 Crankshaft 1998 Crankshaft 1997 Crankshaft 1996 Crankshaft 1995 Crankshaft 1994 Crankshaft 1993 Crankshaft 1992 Crankshaft 1991 Crankshaft 1990 Crankshaft 1989 Crankshaft 1988 Crankshaft 1987 Crankshaft 1986 Crankshaft 1985 Crankshaft 1984 Crankshaft 1983 Crankshaft 1982 Crankshaft
