Contact Us Live Chat or 1-888-726-6993
My Garage
My Account
Cart
Make sure this part fits

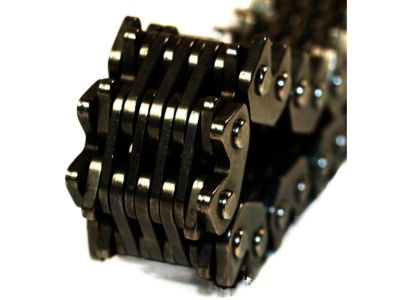
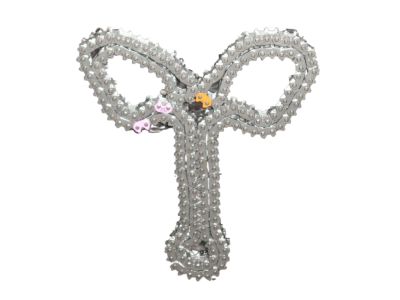
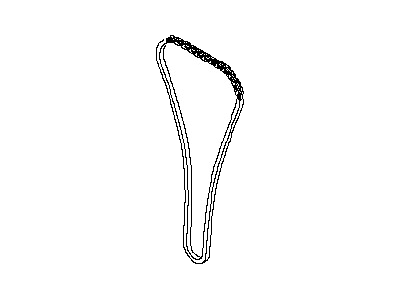
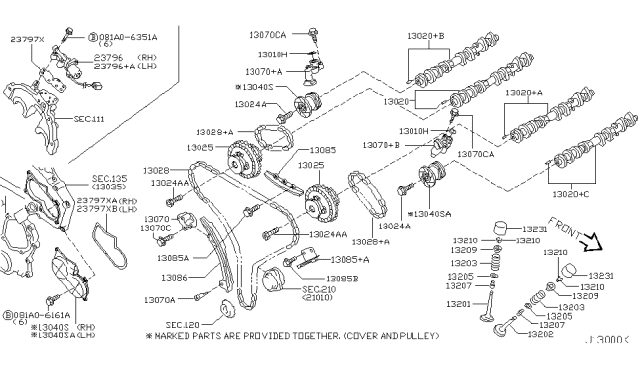
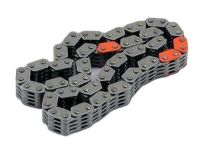
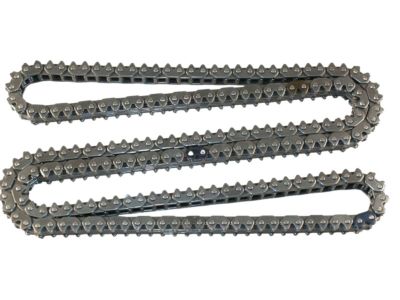
Nissan 13028-JK00A Chain-CAMSHAFT

2001-2015 Nissan 13028JK00A

Customer Questions & Expert Answers (3)
Nissan 13028-JK00A Chain-CAMSHAFT
  • Part Description
    Timing Chain-Camchaft
  • Lookup Code
    13028
  • Replaces
    13028-AL500, 13028-AC700
  • Manufacturer
    Nissan
Make sure this part fits
$96.34 MSRP: $146.53
You Save: $50.19 (35%)
Ships in 1-3 Business Days
1
ADD TO CART
  • Related Parts
  • Product Specifications
  • Vehicle Fitment
  • Customer Questions & Expert Answers
  • Product Specifications

    BrandGenuine Nissan
    Lookup Code13028
    Manufacturer Part Number13028-JK00A
    Part DescriptionTiming Chain-Camchaft
    Other NamesTiming Chain
    Item Dimensions5.1 x 3.4 x 0.8 inches
    Item Weight1.90 Pounds
    ConditionNew
    Fitment TypeDirect Replacement
    Replaces13028-AL500, 13028-AC700
    ManufacturerNissan
    SKU13028-JK00A
    WarrantyThis genuine Nissan part is guaranteed by Nissan's factory warranty.
    Shipping & ReturnShipping Policy Return Policy
    Warning: California’s Proposition 65
  • Vehicle Fitment

    Year Make Model Trim & Engine Important vehicle option details
    2003-2007 Nissan 350Z350Z, Base, Enthusiast, GT, Touring, Track|6 Cyl 3.5LVQ35DE
    2002-2003 Nissan AltimaSE|6 Cyl 3.5LVQ35DE
    2001-2003 Nissan MaximaGLE, GXEL, SEL, SES|6 Cyl 3.5LVQ35DE
    2003-2014 Nissan MuranoLE, LE/ROOF, S, SE, SL, SL/ROOF, SV|6 Cyl 3.5LVQ35DE
    2011-2015 Nissan QuestLE, S, SL, SV|6 Cyl 3.5LVQ35DE
  • Customer Questions & Expert Answers

    Q:
    Will this part fit my car? Posted by NissanPartsDeal Specialist
    A:
    You can Select Your Vehicle to check if 13028-JK00A fits your vehicle.
    Posted by NissanPartsDeal Specialist
    Q:
    How to replace the timing chains and Sprocket in an engine on Nissan Murano? Posted by Customer
    A:
    The timing system is complex, and severe engine damage will occur if mistakes are made; do not attempt this procedure unless highly experienced with this type of repair, and consult an expert if unsure of abilities. Double-check all work and ensure everything is correct before attempting to start the engine. Begin by having a qualified air conditioning shop recover the refrigerant from the air conditioning system, then relieve the fuel system pressure and disconnect the cable from the negative terminal of the battery. Block the rear wheels, set the parking brake, raise the front of the vehicle, and support it securely on jackstands. Drain the cooling system, power steering fluid, and engine oil, then remove the power steering fluid reservoir, top and bottom engine covers, right inner fender splash shield, and front air inlet duct. Remove the upper intake manifold, valve covers, and dipstick, and position the number one piston at TDC on the compression stroke. Remove the drivebelt, upper radiator hose, lower radiator hose, coolant reservoir, cooling fan assembly, starter, power steering pump, air conditioning compressor, alternator and its bracket, and crankshaft pulley, ensuring the crankshaft does not rotate during removal. Remove the bolts from the engine oil cooler tube and its bracket, disconnect wiring from the oil pressure switch and valve timing control wiring harness, and label any other interfering wiring and hoses. Remove the bolts from the IVT covers in reverse of the tightening sequence, pull the covers straight off, and remove the drivebelt tensioner, air conditioning idler pulley, and its bracket. Remove the bolts of the front timing chain cover in reverse of the tightening sequence, pry the cover off, and remove the O-ring below each intake camshaft sprocket. Confirm that the number one piston is still at TDC on the compression stroke by verifying the intake and exhaust camshaft lobes on the number one cylinder are pointing upward. Relieve tension on the primary timing chain, lock the primary tensioner in place, and remove the primary timing chain tensioner, tensioner pivot arm/chain guide, and upper timing chain guides. Lock the secondary timing chain tensioners in place, remove the camshaft sprocket bolts, disengage the primary timing chain from the teeth on the chain sprockets, and mark the camshaft sprockets with either an R or L before removing them and the secondary timing chains. Remove the crankshaft sprocket and lower timing chain guide, and if necessary, remove the rear timing chain cover. Inspect the camshaft, water pump, and crankshaft sprockets for wear, and check the chains for cracks or excessive wear. Before starting the engine, carefully rotate the crankshaft by hand through at least two full revolutions; if any resistance is felt, stop and find the problem. If the rear timing chain cover was removed, install it now, then install the crankshaft sprocket and lower timing chain guide with the mark facing up. Verify the correct timing chains by counting the number of links and comparing the new chains with the old ones. Position the camshafts with the dowels in the correct position, install the secondary timing chains and sprocket assemblies, and hand-tighten the camshaft sprocket bolts. Reconfirm the alignment of the secondary camshaft sprocket timing marks, remove the stopper pins from the secondary chain tensioners, and install the primary timing chain onto the engine, ensuring the colored links align with the marks on the sprockets. Install the upper timing chain guides, primary tensioner arm/chain guide, and timing chain tensioner assembly, then reconfirm the number one piston is still at TDC and the timing marks are aligned before removing the stopper pin from the primary timing chain tensioner. Tighten the camshaft sprocket bolts to the specified torque, remove old sealant from the timing chain cover, and install new O-rings in the variable valve timing oil control orifice of the rear timing cover. Apply RTV sealant to the timing chain cover sealing surfaces, place the cover in position, and install the bolts in their original locations, tightening them to the specified torque. Install new O-rings in the IVT orifices of the front timing chain cover and on the IVT actuator covers, apply RTV sealant to the sealing surface of the variable valve timing actuator covers, and install the IVT covers. The remainder of the installation is the reverse of removal, ensuring to follow sealant manufacturer's recommendations for assembly and curing times. Fill the crankcase with oil, install a new filter, refill the cooling system, reconnect the battery, and perform the necessary re-learn procedures. Timing chain noise may be apparent after this procedure, which is normal and should subside as air bleeds out of the primary timing chain tensioner; if the noise persists, run the engine at 3,000 rpm with the transmission in Neutral or Park until it subsides.
    Posted by NissanPartsDeal Specialist
    Q:
    How to replace the Timing Chain and Variable Timing Sprocket on Nissan 350Z? Posted by Customer
    A:
    This process is elaborate and should only be carried out by persons who have a lot of experience in such machining jobs and this can only be done when the engine is cool. It is imperative to indicate the detailed interconnection of all the parts before disassembly; the length and position of various bolts; and using the instant or digital cameras for orientation. The first steps would involve the following; you would reduce the fuel pressure in the system and also grounds the negative terminal of the battery. Pull out the engine cover, drive belts, idler pulley brackets, and spark plugs; the piston number one should be at the TDC on compression stroke. Lock the rear wheels, engage the parking brake, securely raise the front end of the automobile on jack stands , and drain the engine and radiator coolant as well as the oil. Disconnect the upper and lower radiator and water hoses, fans, the radiator, crank and air conditioning compressor with its refrigerant lines remaining connected and the upper and lower oil pans. Unless the timing chain rear housing is being taken out for some other reason, just the lower oil pan has to be pulled. Disconnect and partially remove the intake manifold plenums, valve covers, power steering pump without letting out the hoses, fans pulley bracket, and alternator. Remove the variable valve timing sensors from the front timing chain cover and then take off the actuator covers, if the magnet retarder is broken, be careful in separating the covers to avoid damaging it. Pull the wiring harness away from the brackets that are at the top of the timing chain cover, take out the bolts on the front timing chain cover and make sure that the number one piston is still at the TDC. Loosen the stress on the main timing belt, then fasten the tensioner and set it aside with the tensioner arm and the timing chain sprockets too. Screw in and lock the secondary timing chain tensioners, take out the camshaft sprocket bolts, release the primary timing chain and scribe the camshaft sprockets. Check for wear on the camshaft, water pump, crankshaft sprockets as well as the chains and the chain guides. Crank the engine to see if there is some opposition at the crankshaft in which case you would need to fix it. Check the correct timing chains by counting the links, and it is advised to compare the new chains with the old ones. If secondary tensioners were removed, reinstall new ones, adjust camshafts as required, and install the secondary timing chains and sprockets. Ensure correct nomination of the colored links and fit the primary timing chain so that timing marks fit. Before tightening the upper timing chain guides; primary tensioner arm, and the timing chain tensioner assembly you need to ensure that number one piston is still at TDC. Torque cam sprocket bolt to 17 ft. lbs., remove old sealant from front CHNG time chain cover, and replace with new O-rings at variably valve timing oil control orifice. Cohesively spread RTV sealant on the sealing surface of the timing cover, align the front timing cover and put the various bolts in their rightful positions. New O-rings should be placed in the VVT orifices while the actuator covers should be correctly positioned before the bolts are tightened while the RTV sealant is applied. To reinstall the sealant, complete the level in the reverse order in which the components were removed, but in accordance with the manufacturer's guidelines on assembly and cure time of the sealant. replace the oil filter, top up the crankcase with oil and the radiator with water, or antifreeze as the case may be. Lubricate the engine, scanned for any leakage, and if needed do a computer relearn then try to listen for a strange sound or vibration of the engine.
    Posted by NissanPartsDeal Specialist
    If you have any questions about this product, please don't hesitate to ask us. We will be happy to help you!

Genuine Nissan Part 13028-JK00A, the Right Choice

To ensure reliability, purchase Nissan part # 13028-JK00A Chain-CAMSHAFT. It is sometimes referred to as Nissan Timing Chain. OEM parts are the #1 choice in terms of quality. Crafted by Nissan, they follow rigorous factory specs and go through the demanding quality control processes during manufacturing. This part fits 2003-2007 Nissan 350Z, 2002-2003 Nissan Altima, 2001-2003 Nissan Maxima, 2003-2014 Nissan Murano.

NissanPartsDeal.com is a leading supplier of genuine Nissan parts and accessories such as Nissan 13028JK00A Chain-CAMSHAFT. Welcome to our vast selection of competitively-priced genuine Nissan parts available online. Each OEM Nissan part we provide is backed by a manufacturer's warranty and is subject to a stress-free return policy. Place your order now and receive your parts quickly, shipped directly to your doorstep.

Why choose Nissan Parts Deal

  • Dedicated Service

    Your complete satisfaction is our #1 goal

  • Lowest Prices

    Best deals on genuine OE parts from dealerships

  • Fast Delivery

    Orders are processed and delivered promptly