Contact Us Live Chat or 1-888-726-6993
My Garage
My Account
Cart
Make sure this part fits

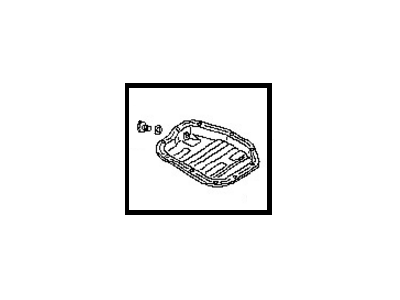
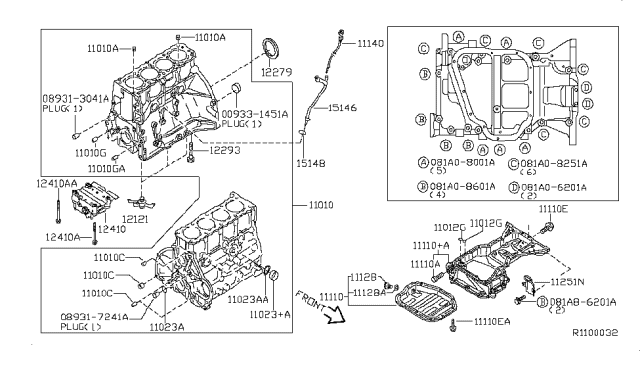
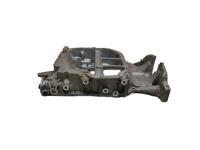
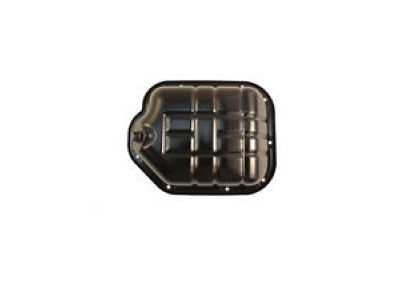
Nissan 11110-JA10C Pan Assy Oil

2007-2012 Nissan Altima 11110JA10C

Customer Questions & Expert Answers (3)
Nissan 11110-JA10C Pan Assy Oil
  • Part Description
    Pan Assy-Oil
  • Lookup Code
    11110
  • Replaced By
    11110-JA12C
  • Manufacturer
    Nissan
Make sure this part fits
$239.54 MSRP: $319.38
You Save: $79.84 (25%)
Ships in 1-3 Business Days
1
ADD TO CART
  • Related Parts
  • Product Specifications
  • Vehicle Fitment
  • Customer Questions & Expert Answers
  • Product Specifications

    BrandGenuine Nissan
    Lookup Code11110
    Manufacturer Part Number11110-JA10C
    Part DescriptionPan Assy-Oil
    Item Dimensions21.9 x 16.8 x 7.7 inches
    Item Weight15.20 Pounds
    ConditionNew
    Fitment TypeDirect Replacement
    ManufacturerNissan
    SKU11110-JA10C
    WarrantyThis genuine Nissan part is guaranteed by Nissan's factory warranty.
    Shipping & ReturnShipping Policy Return Policy
    Warning: California’s Proposition 65
  • Vehicle Fitment

    Year Make Model Trim & Engine Important vehicle option details
    2007-2012 Nissan AltimaSE, SL, SR|6 Cyl 3.5LVQ35DE
  • Customer Questions & Expert Answers

    Q:
    Will this part fit my car? Posted by NissanPartsDeal Specialist
    A:
    You can Select Your Vehicle to check if 11110-JA10C fits your vehicle.
    Posted by NissanPartsDeal Specialist
    Q:
    How to remove and install the lower steel oil pan and upper aluminum oil pan on 4 cylinder Nissan Altima? Posted by Customer
    A:
    Before any physical manipulation of the lower steel oil pan and the upper aluminum oil pan, it is advisable to discharge the electrical component of the system by connecting the cable to a negative terminal of a battery. After that, remove the right front wheel lug nuts and raise the front of the car with a jack till you place the jackstands, and secure it. Suck the oil out of the engine and unbolt the front part of the exhaust pipe. The air conditioning compressor drivebelt should be detached / loosened before disconnecting the power steering hoses attached to the steering gear, and properly capped off with a plastic tape. Disconnect and take off the power steering cooler hose bracket and the subframe in that area. Loosen and pull out the electrical connector from the air conditioning compressor but do not remove it and unbolt the air conditioning compressor but leave both the refrigerant lines connected. If needed, take off the rear engine mount torque rod bracket and intermediate shaft support bearing bracket from the oil pan. The oil pan can be made of a two-part structure; a metal pan part made from steel and an aluminum part joined to the engine block with bolt. Loosen the oil pan bolts in the opposite sequence that was followed during tightening and then pry off the steel pan using a thin putty knife while ensuring to indict the position of each bolt so that it can be reinstalled properly. First, the specific oil pump screen, torque converter/flywheel cover for the transmission and the screws fixing the upper oil pan to the transmission, followed by those securing the metallic aluminum section to the engine block have to be unbolted. After that, one is required to score around the aluminium section with the putty knife before tucking it down at the transmission end. The gasket is applied in the following manner, scraping off the old gasket material and sealants on the block and oil pan and with brake system cleaner clean carefully without scratching the surfaces. See that the holes for the threaded bolts in the block are nice and clear and examine the steel pan flange for warpage and, if necessary, re-flatten it. Run a 3/16-in. thick stripe of the RTV sealant on the periphery of the aluminum section, and replace the O-rings if any. Place the aluminum section on the properly on the engine block, engage the bolts and tighten them properly as per the torque setting. Disperse RTV sealant and position steel pan within 15 minutes and fasten the bolts up to the recommended torque setting. To complete the installation process, reverse the process and before pouring in the oil, check to see that a new oil filter has been fitted as well as waiting for at least 30 minutes for the RTV to set. Last but not the least, connect the battery again and do all the learn processes that are required.
    Posted by NissanPartsDeal Specialist
    Q:
    What additional steps are needed to access the upper oil pan for the 2009 Nissan Altima? Posted by Customer
    A:
    Raise the front of the vehicle and support it securely on jackstands, then remove the lower oil pan. Remove the engine splash shield and the inner fender splash shields, drain the engine oil, and remove the dipstick and dipstick tube. Drain the coolant, remove the intake manifold collector, engine cooling fan, drivebelt, and front subframe.
    Posted by NissanPartsDeal Specialist
    If you have any questions about this product, please don't hesitate to ask us. We will be happy to help you!

Genuine Nissan Part 11110-JA10C, the Right Choice

To ensure reliability, purchase Nissan part # 11110-JA10C Pan Assy Oil. It is sometimes referred to as Nissan Oil Pan. OEM parts are the #1 choice in terms of quality. Crafted by Nissan, they follow rigorous factory specs and go through the demanding quality control processes during manufacturing. This part fits 2007-2012 Nissan Altima.

NissanPartsDeal.com is a leading supplier of genuine Nissan parts and accessories such as Nissan 11110JA10C Pan Assy Oil. Welcome to our vast selection of competitively-priced genuine Nissan parts available online. Each OEM Nissan part we provide is backed by a manufacturer's warranty and is subject to a stress-free return policy. Place your order now and receive your parts quickly, shipped directly to your doorstep.

Why choose Nissan Parts Deal

  • Dedicated Service

    Your complete satisfaction is our #1 goal

  • Lowest Prices

    Best deals on genuine OE parts from dealerships

  • Fast Delivery

    Orders are processed and delivered promptly