Contact Us Live Chat or 1-888-726-6993
My Garage
My Account
Cart
Make sure this part fits

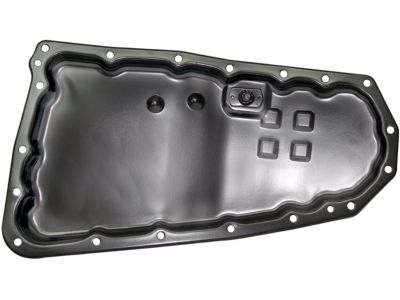
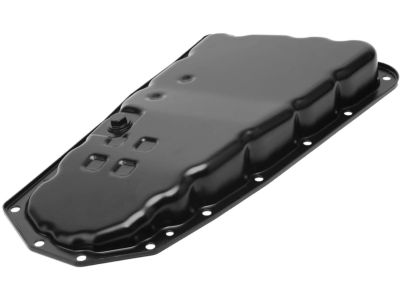
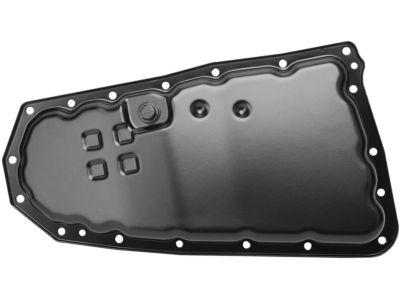
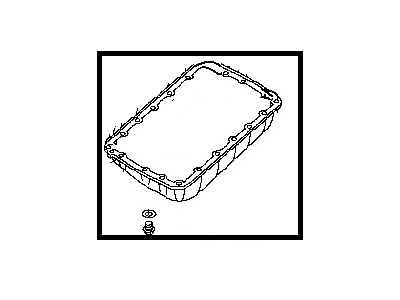
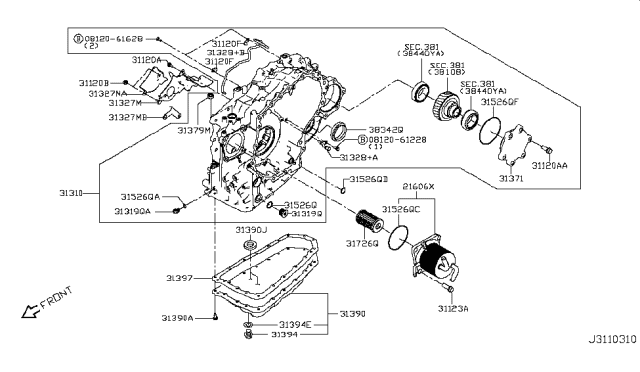
Nissan 31390-1XF00 Pan Assy-Oil

2007-2015 Nissan 313901XF00

Customer Questions & Expert Answers (3)
Nissan 31390-1XF00 Pan Assy-Oil
  • Part Description
    Pan Assy-Oil
  • Lookup Code
    31390
  • Replaces
    31390-1XZ0A
  • Manufacturer
    Nissan
Make sure this part fits
$54.36 MSRP: $76.78
You Save: $22.42 (30%)
Ships in 1-3 Business Days
1
ADD TO CART
  • Related Parts
  • Product Specifications
  • Vehicle Fitment
  • Customer Questions & Expert Answers
  • Product Specifications

    BrandGenuine Nissan
    Lookup Code31390
    Manufacturer Part Number31390-1XF00
    Part DescriptionPan Assy-Oil
    Other NamesTransmission Pan
    Item Dimensions16.2 x 12.6 x 3.6 inches
    Item Weight2.90 Pounds
    ConditionNew
    Fitment TypeDirect Replacement
    Replaces31390-1XZ0A
    ManufacturerNissan
    SKU31390-1XF00
    WarrantyThis genuine Nissan part is guaranteed by Nissan's factory warranty.
    Shipping & ReturnShipping Policy Return Policy
    Warning: California’s Proposition 65
  • Vehicle Fitment

    Year Make Model Trim & Engine Important vehicle option details
    2013-2015 Nissan NVS, SV|4 Cyl 2.0LMR20DE
    2008-2015 Nissan RogueS, SL, SV|4 Cyl 2.5LQR25DE
    2007-2012 Nissan Sentra20, SE-R|4 Cyl 2.0L, 4 Cyl 2.5LMR20DE, QR25DE
  • Customer Questions & Expert Answers

    Q:
    I want to make sure this part fits my car Posted by NissanPartsDeal Specialist
    A:
    You can Select Your Vehicle to check if 31390-1XF00 fits your vehicle.
    Posted by NissanPartsDeal Specialist
    Q:
    How to remove and install the oil pans on Nissan Sentra? Posted by Customer
    A:
    The undertaking entails the stripping off of two pans; the lower steel oil pan and the upper aluminum oil pan with the notion that if only the lower pan is being stripped off, a number of steps may not be taken since the pan is easily accessible. On 2.0L engines, the upper oil pan is best reached by separating the engine and transaxle; the oil pump is located with the upper pan, and therefore, cannot be removed individually. Start off by first removing the negative terminal of the battery, then the lugs that holding the right front wheel, placing and topping the car on jackstands safely and finally removing the right front wheel. Sump the engine oil, remove the front portion of the exhaust pipe and the drive belt. On smaller 2.5L engines, the right side of the car, take off the driveaxle bearing bracket and air conditioning compressor; however, leave the lines connected. For the vehicle of 2.0 L power unit, the timing chain cover, timing chain, and oil pump drive chain and sprocket have to be dismantled. Next, remove the flywheel/driveplate. This is made up of a two-part system, consisting of a steel pan fixed to an aluminum piece that is bolted onto the engine; to dismantle the oil pan, undo the oil pan bolts in a backward sequence of how they were tightened and then you can separate the steel part using a thin putty knife more so do not pry the part using a screwdriver. While on 2.5L engines, there are fasteners that holds the oil pump screen and on 2.0L engines, the oil pump an the screen are fixed there permanently. First loosen the bolts that fixed the aluminum section to the engine block, and trim the sealant around the aluminum section with putty knife and then pry it down at the transaxle end. For installation, use a scraper to remove old gasket material and sealant on the flanks of the metallic surfaces, clean the areas that the bolts are to screw into, and make sure they are clean. Make sure the steel pan flange has not distorted and needs to be repaired if it has. Spread a 3/16-inch wide strip of RTV sealant around the section of aluminum, and replace the O-rings if there are Some, place the section of aluminum on the engine block, then put the bolts in and tighten them in a star pattern to the recommended torque. Cookie all the round RO sealant in the steel pan perimeter and set the pan in the RV within 15 minutes by successively applying torque to the bolts. Re-install the removed parts by substituting the old oil filter with the new one, wait for at least half an hour before adding oil to let the RTV set, reconnect the battery and perform any re-learn operations.
    Posted by NissanPartsDeal Specialist
    Q:
    What does the procedure describe regarding the removal of the lower steel oil pan and the upper aluminum oil pan on Nissan Rogue? Posted by Customer
    A:
    Much attention is paid to the procedure of the lower steel oil pan and the upper aluminum oil pan removal, whereas it is stated that if the only with lower pan is carried out, many steps can be omitted due to its accessibility. First, remove the nutrients of negative battery terminal, then loosen the lug nuts of the right front wheel and jack up the vehicle, and at last, take out the right front wheel off from the car. Suck out the engine oil and remove the engine oil filter next, and remove the engine oil dipstick tube this time and fit a new O-ring ring on the tube. Take out next the front part of the exhaust pipe, the drivebelt, as well as the right side driveaxle bearing bracket; next, the air conditioning compressor with its lines remaining connected. As the following step, you have to take out the lower torque rod and the transfer case for the AWD car models, after that you have to unbolt the stabilizer bar link and unbolt pr front subframe. The oil pan as a two-part construction: a steel pan, which is welded to an aluminum part which is sculpture to the block head. Uncrown the bolts that hold the oil pan starting from the reverse sequence in which you tightened them and use a thin putty knife to detach the steel pan but ensure that the sealing surface is not damaged. Label all the bolts for re-assembly next, then unscrew and pull out the oil pump screen and its supporting bolts. Unfasten the bolts that hold the aluminum section to the engine block turning the bolts in the reverse order of tightening and proceed to cut the sealant on the aluminum section before finally prying it down. Regarding installation, it is advisable to cut and remove all the old gasket material and sealant on the block and the oil pan without scratching the surfaces. Ensure the steel pan flange is not distorted and place a strip of RTV sealant on the perimeter of the aluminum section and place in within 15 minutes. If it's required new shorter O-rings to fit them, place the aluminum section on the engine block, and fasten all bolts in a sequence in correct torque limit. Where required, use RTV sealant on the steel pan, then place the steel pan in the location and refraining from loosening the bolts tighten them in concentric pattern to the indicated torque. To complete the removal process, reverse the outlined tasks, include the installation of a new oil filter, wait for the RTV to set for at least half an hour, join the battery terminals if required to perform re-learn procedures.
    Posted by NissanPartsDeal Specialist
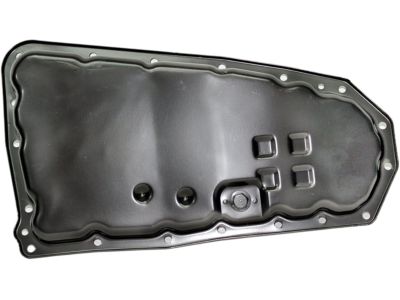
    If you have any questions about this product, please don't hesitate to ask us. We will be happy to help you!

Genuine Nissan Part 31390-1XF00, the Right Choice

To ensure reliability, purchase Nissan part # 31390-1XF00 Pan Assy-Oil. It is sometimes referred to as Nissan Oil Pan, Nissan Transmission Pan. OEM parts are the #1 choice in terms of quality. Crafted by Nissan, they follow rigorous factory specs and go through the demanding quality control processes during manufacturing. This part fits 2013-2015 Nissan NV, 2008-2015 Nissan Rogue, 2007-2012 Nissan Sentra.

NissanPartsDeal.com is a leading supplier of genuine Nissan parts and accessories such as Nissan 313901XF00 Pan Assy-Oil. Welcome to our vast selection of competitively-priced genuine Nissan parts available online. Each OEM Nissan part we provide is backed by a manufacturer's warranty and is subject to a stress-free return policy. Place your order now and receive your parts quickly, shipped directly to your doorstep.

Why choose Nissan Parts Deal

  • Dedicated Service

    Your complete satisfaction is our #1 goal

  • Lowest Prices

    Best deals on genuine OE parts from dealerships

  • Fast Delivery

    Orders are processed and delivered promptly