Contact Us: Live Chat or 1-888-726-6993
My Garage
My Account
My Cart
Make sure this part fits your vehicle

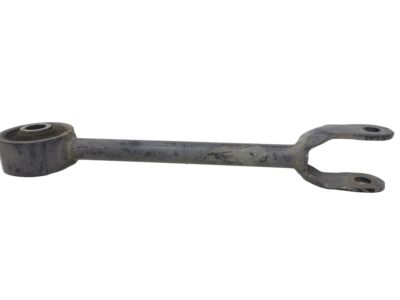
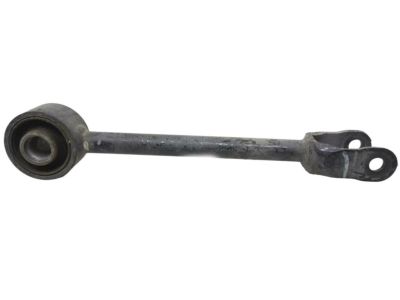
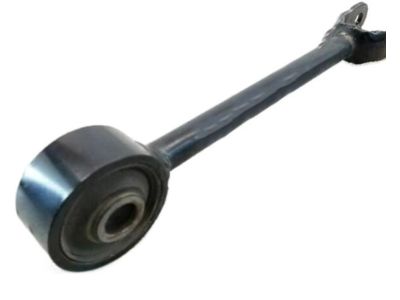
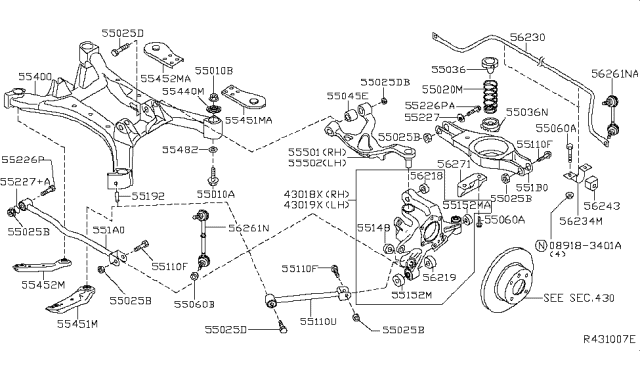
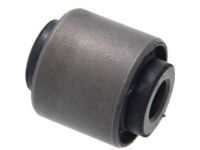
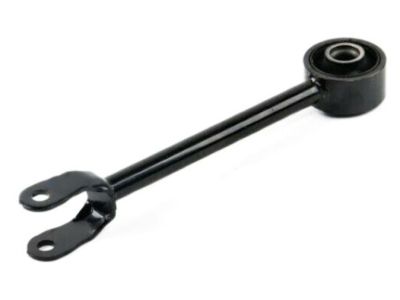
Nissan 55110-ZX00B Rod Complete Radius

2009-2022 Nissan 55110ZX00B

Nissan 55110-ZX00B Rod Complete Radius
  • Part Description
    Rod Complete-Radius
  • Lookup Code
    55110U
  • Manufacturer
    Nissan
Customer Questions & Answers
$43.11 MSRP: $57.48
You Save: $14.37 (25%)
1
ADD TO CART
Ships in 1-3 Business Days
  • Product Specifications

    BrandGenuine Nissan
    Lookup Code55110U
    Manufacturer Part Number55110-ZX00B
    Part DescriptionRod Complete-Radius
    Other NamesRadius Arm, Radius Rod, Trailing Arm
    Item Dimensions13.7 x 2.6 x 2.1 inches
    Item Weight2.30 Pounds
    ConditionNew
    Fitment TypeDirect Replacement
    Require Quantity2
    ManufacturerNissan
    SKU55110-ZX00B
    WarrantyThis genuine Nissan part is guaranteed by Nissan's factory warranty.
    Shipping & ReturnShipping Policy Return Policy
    Warning: California’s Proposition 65
  • Vehicle Fitment

    Year Make Model Trim & Engine Important vehicle option details
    2019-2022, 2009-2013 Nissan AltimaBase, Hybrid, Platinum, S, SE, SL, SR, SV|4 Cyl 2.5L, 6 Cyl 3.5LPR25DD, QR25DE, VQ35DE
    2010-2014 Nissan MaximaLE, Premium, S, Sport, SR, SV|6 Cyl 3.5LVQ35DE

Customer Questions & Answers

Q:
I'm trying to find out if this part number or item fits my vehicle. Posted by NissanPartsDeal Specialist
A:
You can Select Your Vehicle to check if 55110-ZX00B fits your vehicle.
Posted by NissanPartsDeal Specialist
Q:
How do you properly remove and install the Trailing Arm of a Nissan Altima? Posted by Customer
A:
Loosen the rear wheel lug nuts, then raise the rear of the vehicle and support it securely on jackstands before removing the wheel. Remove the coil spring, followed by the lower arm-to-knuckle mounting bolt/nut, and take out the lower rear suspension arm. For installation, raise the lower suspension arm with a floor jack to normal ride height and tighten the suspension arm bolt/nuts to the specified torque, ensuring the marks on the adjusting cam and subframe are aligned. Tighten the wheel lug nuts to the specified torque. Support the rear lower suspension arm with a floor jack under the coil spring pocket, keeping the jack in place until the arm is reinstalled. Mark the relationship of the adjusting cam to the subframe before loosening the inner pivot bolt, then remove the lower front suspension arm-to-subframe and lower front suspension arm-to-knuckle mounting bolt/nut, and take out the arm. For installation, raise the lower suspension arm with a floor jack to normal ride height and tighten the suspension arm bolt/nuts to the specified torque, ensuring alignment of the marks on the adjusting cam and subframe, followed by tightening the wheel lug nuts. Raise the vehicle and support it securely on jackstands, then remove the rear wheel speed sensors and the rear wheel brake calipers, hanging them out of the way with wire to avoid stress on the hoses, and remove the brake discs. Disconnect the parking brake cables from the knuckles, remove the nuts from the lower shock absorber mounts, and take out the lower rear suspension arms. Remove the cotter pins and nuts from the upper suspension arm balljoint, disconnect the radius rods from the subframe, and remove the front lower suspension arms. Remove the knuckles and the stabilizer bar, then disconnect the wiring harness from the rear subframe and upper arms. Place two floor jacks under the rear subframe for secure support, remove the subframe mounting bolts, and carefully lower the rear subframe until it is clear of the vehicle body. Remove the stabilizer bar brackets from the upper suspension arms, then take out the upper suspension arm mounting nuts and bolts, followed by the upper suspension arms. For installation, reverse the removal steps, ensuring to tighten the ball/joint stud nut to the specified torque, raise the lower suspension arm with a floor jack to normal ride height, and tighten the pivot bolt nuts to the specified torque, followed by tightening all other fasteners to their respective torques.
Posted by NissanPartsDeal Specialist
Q:
How to remove and install the radius rod on Nissan Altima? Posted by Customer
A:
Loosen the rear wheel lug nuts, then raise the rear of the vehicle and support it securely on jackstands while blocking the front wheels to prevent rolling. Remove the wheel, followed by the radius rod-to-subframe and radius rod-to-knuckle mounting bolt/nut. After removing the radius rod from the vehicle, installation involves reversing the removal steps, ensuring to raise the rear lower suspension arm with a floor jack to normal ride height before tightening the radius rod fasteners to the specified torque, and finally tightening the wheel lug nuts to the appropriate torque.
Posted by NissanPartsDeal Specialist
If you have any questions about this product, please don't hesitate to ask us. We will be happy to help you!

Genuine Nissan Part 55110-ZX00B, the Right Choice

To ensure reliability, purchase Nissan part # 55110-ZX00B Rod Complete Radius. It is sometimes referred to as Nissan Radius Arm, Nissan Trailing Arm. OEM parts are the #1 choice in terms of quality. Crafted by Nissan, they follow rigorous factory specs and go through the demanding quality control processes during manufacturing. This part fits 2009-2022 Nissan Altima, 2010-2014 Nissan Maxima.

NissanPartsDeal.com is a leading supplier of genuine Nissan parts and accessories such as Nissan 55110ZX00B Rod Complete Radius. Welcome to our vast selection of competitively-priced genuine Nissan parts available online. Each OEM Nissan part we provide is backed by a manufacturer's warranty and is subject to a stress-free return policy. Place your order now and receive your parts quickly, shipped directly to your doorstep.

Why choose Nissan Parts Deal

  • Dedicated Service

    Your complete satisfaction is our #1 goal

  • Lowest Prices

    Best deals on genuine OE parts from dealerships

  • Fast Delivery

    Orders are processed and delivered promptly