Contact Us Live Chat or 1-888-726-6993
My Garage
My Account
Cart
Make sure this part fits

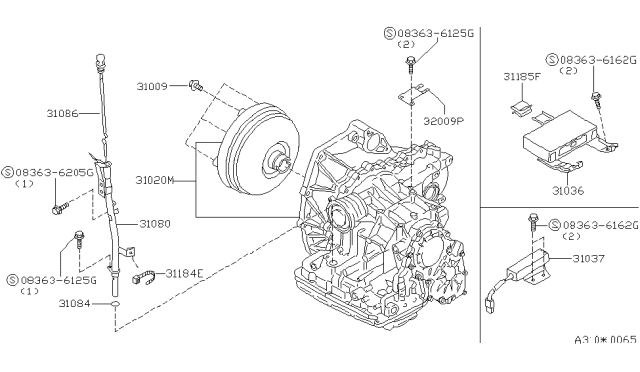
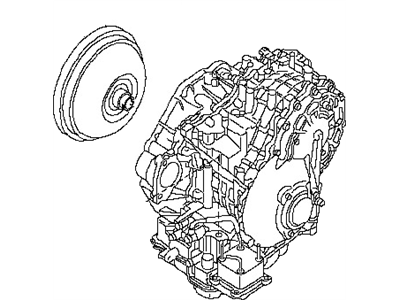
Nissan 31020-80X77 Automatic Transmission Assembly

1999-2003 Nissan Quest 3102080X77

Customer Questions & Expert Answers (2)
Nissan 31020-80X77 Automatic Transmission Assembly
  • Part Description
    Transaxle Assy-Automatic
  • Lookup Code
    31020M
  • Replaced By
    (MultiSupersession)
  • Replaces
    31020-81X14
  • Manufacturer
    Nissan
  • Manufacturer's Notes
    This part is discontinued.
Make sure this part fits
  • Related Parts
  • Product Specifications
  • Vehicle Fitment
  • Customer Questions & Expert Answers
  • Product Specifications

    BrandGenuine Nissan
    Lookup Code31020M
    Manufacturer Part Number31020-80X77
    Part DescriptionTransaxle Assy-Automatic
    Other NamesTransaxle
    Item Dimensions31.2 x 30.9 x 23.7 inches
    Item Weight274.30 Pounds
    ConditionNew
    Fitment TypeDirect Replacement
    Replaces31020-81X14
    ManufacturerNissan
    SKU31020-80X77
    WarrantyThis genuine Nissan part is guaranteed by Nissan's factory warranty.
    Shipping & ReturnShipping Policy Return Policy
    Warning: California’s Proposition 65
  • Vehicle Fitment

    Year Make Model Trim & Engine Important vehicle option details
    1999-2003 Nissan QuestGXE, SE|6 Cyl 3.3LVG33E
  • Customer Questions & Expert Answers

    Q:
    I want to make sure this part fits my car Posted by NissanPartsDeal Specialist
    A:
    You can Select Your Vehicle to check if 31020-80X77 fits your vehicle.
    Posted by NissanPartsDeal Specialist
    Q:
    How do you remove and install a transaxle on Nissan Quest? Posted by Customer
    A:
    To replace the transaxle,disconnect the battery cables; first is the negative followed by the positive; then the battery and the tray. Then, have the air intake duct and air cleaner housing pulled out, then the starter motor. Remove the top of the transaxle cover and unplug the ground cable on the transaxle, and the connectors on the transaxle as well as the connector of the vehicle speed sensor. After that, use the other three bolts to half tighten the upper transaxle and engine mount and then use the jack to lift the car and put it on stands, and then take off the front wheels of the car. Take off the splash shield under the front section for the engine and then unlock the linkage of the shift cable and also drain the fixed cooler lines from the transaxle. Place support under the engine from above, siphon off the contents of the transaxle and disassemble the vehicle of the catalytic converter. Step by step it is possible to get to the Exhaust pipe bracket-unbolting it, detaching the control arms from the steering knuckles, and last but not least, the bolts of the intermediate shaft bearing support. Begin by prying the right driveaxle and intermediate shaft from the transaxle as a single unit using a pry-bar and wire the intermediate shaft, the same is done to the left driveaxle. The underhood transaction, transaxle-to-engine brace and lower bolts, electrical connector to the valve body, the exhaust bracket assembly and the torque converter access plate must be removed. Untighten the torque converter bolts and make an alignment of them; position a transaxle jack under the transaxle and lift only sufficient to unload the engine mounts. The left front and rear transaxle mount and bracket has to be taken off, transaxle breather tube has to be disconnected; all the wires and hoses to be disconnected before pulling the transaxle away from the engine and lowering it down. Check the torque converter and the seal for the signs of wear and tear; replace these if required. For reinstalling, if removed, screws the torque converter back into the transaxle until it fits in tightly. Having positioned the transaxle against the jack, slowly lift it up and place it behind the engine, aligning it in the dowel pins and bolt holes without applying force. Torque the mounting bolts of the engine to transaxle in the sequence and use the transaxle mounts and tighten the bolts. Secure the shift cable on to the transaxle bracket; position the transaxle marks on the driveplate and torque converter; fasten the torque converter bolts whereafter tightening of the bolts is commenced when all are in place . Perform the engine-to-transaxle mounting bolt and the transaxle ground strap, and install the intermediate shaft & the left drive axal w/ retaining clip. Bolt the control arms to the steering knuckles, fit the splash shield and front wheels and lower the vehicle and refill the transaxle with the recommended fluid. Last of all, carry out road test to see if the vehicle is operating properly, take another check for leakage and in case there is vibration take the following sequence of actions; loosen and tighten the engine mounts again.
    Posted by NissanPartsDeal Specialist
    If you have any questions about this product, please don't hesitate to ask us. We will be happy to help you!

Genuine Nissan Part 31020-80X77, the Right Choice

To ensure reliability, purchase Nissan part # 31020-80X77 Automatic Transmission Assembly. It is sometimes referred to as Nissan Transmission Assembly. OEM parts are the #1 choice in terms of quality. Crafted by Nissan, they follow rigorous factory specs and go through the demanding quality control processes during manufacturing. This part fits 1999-2003 Nissan Quest.

NissanPartsDeal.com is a leading supplier of genuine Nissan parts and accessories such as Nissan 3102080X77 Automatic Transmission Assembly. Welcome to our vast selection of competitively-priced genuine Nissan parts available online. Each OEM Nissan part we provide is backed by a manufacturer's warranty and is subject to a stress-free return policy. Place your order now and receive your parts quickly, shipped directly to your doorstep.

Why choose Nissan Parts Deal

  • Dedicated Service

    Your complete satisfaction is our #1 goal

  • Lowest Prices

    Best deals on genuine OE parts from dealerships

  • Fast Delivery

    Orders are processed and delivered promptly