Contact Us Live Chat or 1-888-726-6993
My Garage
My Account
Cart
Make sure this part fits

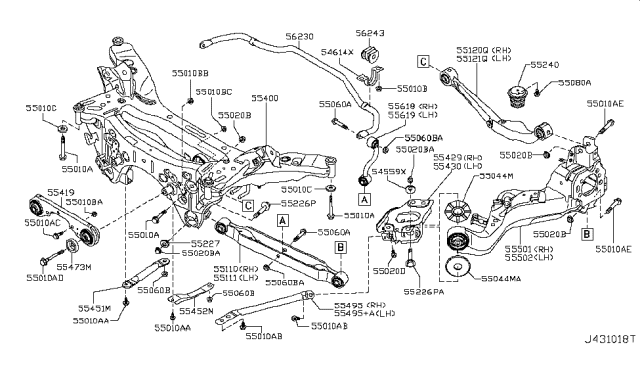
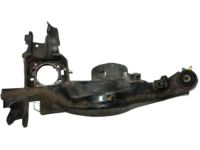
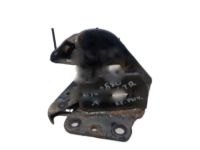
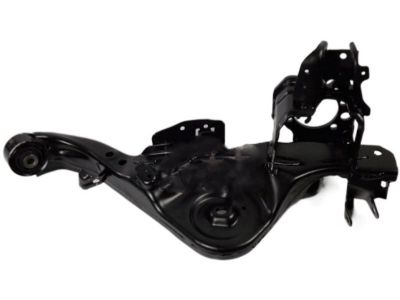
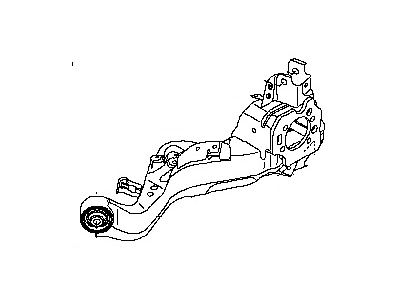
Nissan 55501-JG000 Arm Assy-Rear Suspension,Rh

2008-2014 Nissan Rogue 55501JG000

Customer Questions & Expert Answers (4)
Nissan 55501-JG000 Arm Assy-Rear Suspension,Rh
  • Part Description
    Arm Assy-Rear Suspension,Rh
  • Lookup Code
    55501
  • Position
    Passenger Side
  • Replaced By
    55501-JG02E
  • Manufacturer
    Nissan
Make sure this part fits
$263.44 MSRP: $403.88
You Save: $140.44 (35%)
Ships in 1-2 Business Days
1
ADD TO CART
  • Related Parts
  • Product Specifications
  • Vehicle Fitment
  • Customer Questions & Expert Answers
  • Product Specifications

    BrandGenuine Nissan
    Lookup Code55501
    Manufacturer Part Number55501-JG000
    Part DescriptionArm Assy-Rear Suspension,Rh
    Item Dimensions30.2 x 15.2 x 15.3 inches
    Item Weight20.20 Pounds
    PositionPassenger Side
    ConditionNew
    Fitment TypeDirect Replacement
    ManufacturerNissan
    SKU55501-JG000
    WarrantyThis genuine Nissan part is guaranteed by Nissan's factory warranty.
    Shipping & ReturnShipping Policy Return Policy
    Warning: California’s Proposition 65
  • Vehicle Fitment

    Year Make Model Trim & Engine Important vehicle option details
    2008-2014 Nissan RogueS, SL, SV|4 Cyl 2.5LQR25DE
  • Customer Questions & Expert Answers

    Q:
    I'm trying to find out if this part number or item fits my vehicle. Posted by NissanPartsDeal Specialist
    A:
    You can Select Your Vehicle to check if 55501-JG000 fits your vehicle.
    Posted by NissanPartsDeal Specialist
    Q:
    How to remove and install the rear suspension components, including the rear coil spring, trailing arm, lower control arm, upper control arm, and rear subframe on Nissan Rogue? Posted by Customer
    A:
    Ease the rear wheel lug nuts, lift the rear part of the car, and then props it up on jack stands before you remove the wheel. Take out the coil spring and note down the orientation of the adjuster cams on the pivot bolt of the trailing arm bracket. Subsequently, extract the arm-to-body bracket mounting bolt at the trailing end and completely take out the trailing arm from the vehicle, on which might be two rubber washers which would have dropped. For installation, loosen and replace the nut of the pivot bolt, make sure the match marks on the adjuster cam and the body bracket align, lift the trailing arm, raise the floor jack and normal ride height and tighten the trailing arm bolt/nuts to the recommended torque. Perform a brake system bleed, torque check on wheel lug nuts and inspect the alignment of wheels. For the lower control arm, you'll have to take out the stabilizer bar link, differentiate on the adjuster cams, secure the stopper of the trailing arm and, then and only then, pull out the lower control arm-to-subframe and trailing arm pivot bolts/nuts. While installing, change the pivot bolt nuts, lift the trailing arm back to the normal ride level, tighten the control arm bolt/nuts, and perform the alignment check. For the upper control arm, gain access to the trailing arm and detach the ABS wheel speed sensor harness mounting bolt and then the upper control arm-to-subframe and the trailing arm-pivot bolts/nuts. Installing the opposite is done in reverse order with emphasis on raising the trailing arm and tightening the control arm bolt/nuts. For the rear subframe, jack up the car and chock securely, then take out the coil springs, the final section of the back pipe, the rear diff on AWD models and the dampers. Discontinue the upper and lower control arms, the stabilizer bar and pull off the wiring harness from the rear subframe. Position two floor jacks and put one under the rear subrack to lift it up and remove the mounting bolts of the subrack; then lower the rear subrack on the two jacks until it is away from the car system. In the case of installation reverse all those mentioned above removal steps, make sure to tighten all the sub-frame and suspension fasteners with a recommended torque values in addition to the wheel lug nuts. Before attempting to torque the suspension fasteners, bring the trailing arm back up to the normal driving height.
    Posted by NissanPartsDeal Specialist
    Q:
    What should be done after installing the trailing arm for the 2016 Nissan Rogue? Posted by Customer
    A:
    Bleed the brake system, tighten the wheel lug nuts, and check the wheel alignment.
    Posted by NissanPartsDeal Specialist
    Q:
    What is the first step to remove the control arm for the 2019 Nissan Rogue? Posted by Customer
    A:
    The first step is to loosen the front wheel lug nuts, raise the front of the vehicle, support it securely on jackstands, and remove the wheel.
    Posted by NissanPartsDeal Specialist
    See expert answers on similar Control Arm
    If you have any questions about this product, please don't hesitate to ask us. We will be happy to help you!

Genuine Nissan Part 55501-JG000, the Right Choice

To ensure reliability, purchase Nissan part # 55501-JG000 Arm Assy-Rear Suspension,Rh. It is sometimes referred to as Nissan Control Arm, Nissan Trailing Arm. OEM parts are the #1 choice in terms of quality. Crafted by Nissan, they follow rigorous factory specs and go through the demanding quality control processes during manufacturing. This part fits 2008-2014 Nissan Rogue.

NissanPartsDeal.com is a leading supplier of genuine Nissan parts and accessories such as Nissan 55501JG000 Arm Assy-Rear Suspension,Rh. Welcome to our vast selection of competitively-priced genuine Nissan parts available online. Each OEM Nissan part we provide is backed by a manufacturer's warranty and is subject to a stress-free return policy. Place your order now and receive your parts quickly, shipped directly to your doorstep.

Why choose Nissan Parts Deal

  • Dedicated Service

    Your complete satisfaction is our #1 goal

  • Lowest Prices

    Best deals on genuine OE parts from dealerships

  • Fast Delivery

    Orders are processed and delivered promptly