Contact Us: Live Chat or 1-888-726-6993
My Garage
My Account
My Cart
Make sure this part fits your vehicle

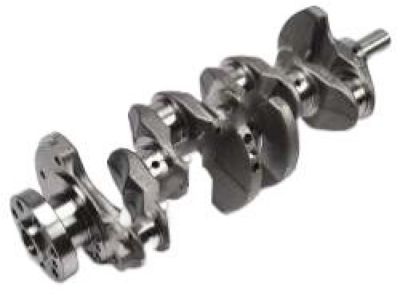
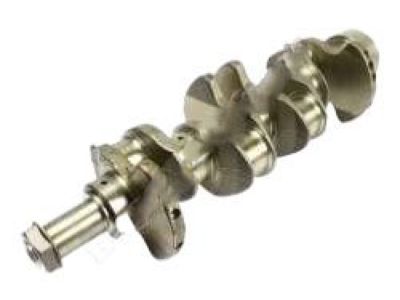
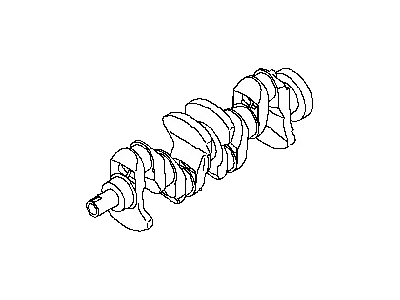
Nissan 12201-JA02A CANKSHAFT Assembly

2006-2013 Nissan 12201JA02A

Nissan 12201-JA02A CANKSHAFT Assembly
  • Part Description
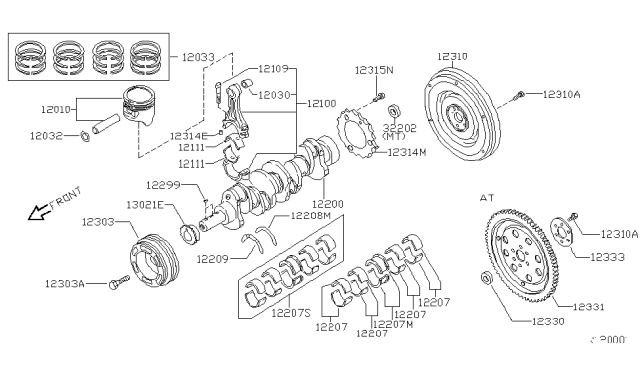
    CRANKSHAFT Assembly
  • Lookup Code
    12200
  • Replaced By
    12201-3TA0A
  • Manufacturer
    Nissan
Customer Questions & Answers
$1304.74 MSRP: $1491.13
You Save: $186.39 (13%)
1
ADD TO CART
Ships in 1-3 Business Days
  • Product Specifications

    BrandGenuine Nissan
    Lookup Code12200
    Manufacturer Part Number12201-JA02A
    Part DescriptionCRANKSHAFT Assembly
    Item Dimensions22.2 x 8.1 x 5.6 inches
    Item Weight32.10 Pounds
    ConditionNew
    Fitment TypeDirect Replacement
    ManufacturerNissan
    SKU12201-JA02A
    WarrantyThis genuine Nissan part is guaranteed by Nissan's factory warranty.
    Shipping & ReturnShipping Policy Return Policy
    Warning: California’s Proposition 65
  • Vehicle Fitment

    Year Make Model Trim & Engine Important vehicle option details
    2007-2013 Nissan AltimaBase, Hybrid, S|4 Cyl 2.5LQR25DE
    2006-2009 Nissan FrontierXE|4 Cyl 2.5LQR25DE
    2007-2012 Nissan SentraSE-R|4 Cyl 2.5LQR25DE

Customer Questions & Answers

Q:
Will this part fit my car? Posted by NissanPartsDeal Specialist
A:
You can Select Your Vehicle to check if 12201-JA02A fits your vehicle.
Posted by NissanPartsDeal Specialist
Q:
How can the crankshaft be removed from the engine after it has been taken out of the Nissan Sentra? Posted by Customer
A:
This removal is possible when the engine has first been pulled off the car and if at least the following parts have been removed; the flywheel, crankshaft pulley, timing chain, crankshaft sump, balance shaft, oil filter, and piston/connecting rod assemblies. First of all, to check the amount of the crankshaft endplay loosen the crankshaft sprocket nuts and place the dial gauge parallel to the crankshaft. Pull the crankshaft to the rear and get the zero on the indicator, then move the crankshaft to the front to take the reading, which should normally range from 0.003 to 0.010 inch (0.076 to 0.254 mm). If the endplay is above this range, then there is possibility that the thrust washer bearing assembly has worn out. If there is no wear observed, new main bearings should solve the problem. In case where a dial indicator cannot be used feeler gauge can be used to determine of the clearance required. Slowly unscrew the main bearing cap bolts until you can remove them by hand, this should be done with new bolts because the old bolts should not be reused. Simply use a soft-faced hammer and give the main bearing caps light knocks to remove them off the cylinder block and do not lose the bearing inserts. Bring up the crankshaft out of the engine , probably with help since it is quite heavy. Place the main bearing cap assembly back on the engine block, ensure the arrow points towards the front. For installation, it requires the engine block and the crankshaft to be clean and-checked. Turn the block with the bottom up, uninstall the main bearing cap assembly, and clean the bearing seats. Install the new upper main bearing inserts in the block and the new lower inserts in the main bearing cap with due regard to the oil holes positions. Scrape and wire the bearing faces and crankshaft journals you want in line and put the crankshaft in place; the thrust washers should be placed on the journal #3. This need to be checked using Plastigage and be within the stipulated range of the main bearing oil clearance. If the clearance is wrong, check the clean area and if needed check for different bearing sizes. Any residue from the Plastigage should be wiped off the journals, as well as the bearing faces. Once you are ready for final fitting, scrub the bearing insert faces in the block, coat it with a thin layer of oil and then place the crankshaft back on. Wipe the bearing insert faces with a clean, dry cloth and apply the lubricant and fit the thrust washers so that the groove is positioned on the outside. For 2.5L engines, coat the RTV sealant around the bed plate sealing area Before fitting the main bearing caps or bedplate to the crank-shaft and block. Wipe clean the threads of the block and apply the engine oil to the threads before tightening the bolts in a gradually, tightening each of them to the required torque in turn. Recheck the crankshaft end play and rotate the crankshaft while inserting some force allowing it to rotate with ease with a running torque of 50 in-lbs or less. Last but not the least; fit a new rear main oil seal.
Posted by NissanPartsDeal Specialist
Q:
How can the crankshaft be removed from the engine after it has been taken out of the Nissan Altima? Posted by Customer
A:
It can be unbolted only if the engine has been pulled out of the car and provided with condition that other such parts as flywheel, crankshaft pulley, timing chain, oil pan, oil pump, oil filter, piston/connecting rod assemblies have been removed. Depending on the model of the engine: in the case of V6 engines, the retainer of the rear main oil seal, in turn, has to be unscrewed from the block. Start with using a dial indicator, place it alongside the crankshaft in order to determine the crankshaft end play. Pull the crankshaft to the rear it to set the indicator to zero then move it to the front to check the reading should be between 0.003 to 0.010 inch. Feelers can be used in case the dial indicator is not available to check the clearance on the machine. It is advised to ease out the main bearing cap bolts until they are seized with the access to be unscrewed and then the entire assembly of the main bearing should be raised gently with the help of a soft-face hammer and the bearing insert should not be dropped on to the block. Slowly raise the crankshaft out, if possible with another person helping, then replace the main bearing cap assembly with the arrow pointing in the forward direction. For installation it will be recommended to have the engine block and crankshaft clean and checked. Place the block in such a manner that the bottom of the block is upwards, thereafter unbolt the main bearing cap assembly and clean the bearing seats. New upper main bearing inserts are to be laid in the block with the oil holes aligning; the lower ones are to be placed in the cap. Scrub and examine bearing surfaces and oil way in the crankshaft. Place the crankshaft as per the needed position, put the thrust washers properly in order and use Plastigage to check the main bearing oil clearance. Once the assembly is in place, coat bolt threads with clean engine oil and tighten in the sequence and do not turn the crankshaft. Take out the assembly to check the setting of Plastigage for further clearance, which should range between 0.0015 to 0.0023 inch. If clearance is off, look for dirt or oil interaction and in all likelihood, the bearing inserts need to be changed. Scrape away remaining Plastigage and, with the engine turned over, raise the crankshaft vertically, speaking from the front of the vehicle, coat the bearings with grease, and gently lower the cranshaft back into its position. Scrub the bearing insert faces and put some grease on the faces to be in contact with the washers and put the washers with the 'V' shaped grooves facing outwards. Regarding the four-cylinder engines, smear RTV sealant on the bedplate sealing area, and then bolt the bedplate or the main bearing caps. Install a single thread of clean engine oil to the bolt threads; turn the bolts just enough to engage them, and reinstall the main bearing cap bolts on V6 applications. Torque all bolts to the required specifications, redo the crankshaft endplay measurement and rotate the crankshaft and feel for any bind; the crankshaft should be able to rotate with a running torque of less than 50 in-lbs. Last of all, fit the new rear main oil seal.
Posted by NissanPartsDeal Specialist
If you have any questions about this product, please don't hesitate to ask us. We will be happy to help you!

Genuine Nissan Part 12201-JA02A, the Right Choice

To ensure reliability, purchase Nissan part # 12201-JA02A CANKSHAFT Assembly. It is sometimes referred to as Nissan Crankshaft. OEM parts are the #1 choice in terms of quality. Crafted by Nissan, they follow rigorous factory specs and go through the demanding quality control processes during manufacturing. This part fits 2007-2013 Nissan Altima, 2006-2009 Nissan Frontier, 2007-2012 Nissan Sentra.

NissanPartsDeal.com is a leading supplier of genuine Nissan parts and accessories such as Nissan 12201JA02A CANKSHAFT Assembly. Welcome to our vast selection of competitively-priced genuine Nissan parts available online. Each OEM Nissan part we provide is backed by a manufacturer's warranty and is subject to a stress-free return policy. Place your order now and receive your parts quickly, shipped directly to your doorstep.

Why choose Nissan Parts Deal

  • Dedicated Service

    Your complete satisfaction is our #1 goal

  • Lowest Prices

    Best deals on genuine OE parts from dealerships

  • Fast Delivery

    Orders are processed and delivered promptly