Contact Us: Live Chat or 1-888-726-6993
My Garage
My Account
My Cart
Make sure this part fits your vehicle

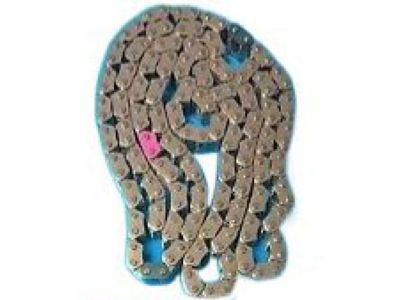
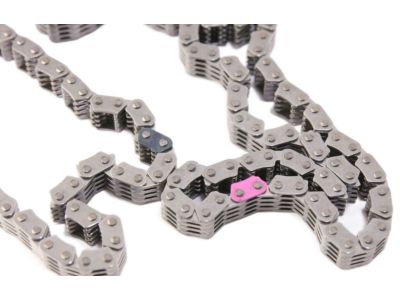
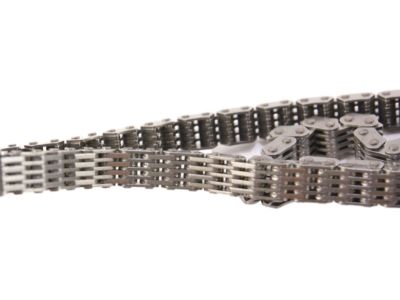
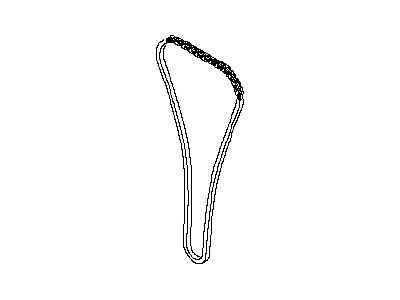
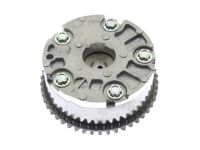
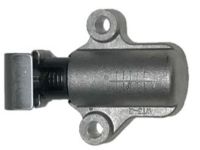
Nissan 13028-JA00A Chain-Timing CAMSHAFT

2006-2014 Nissan 13028JA00A

Nissan 13028-JA00A Chain-Timing CAMSHAFT
  • Part Description
    Timing Chain-Camchaft
  • Lookup Code
    13028
  • Replaced By
    13028-JA01A
  • Manufacturer
    Nissan
Customer Questions & Answers
$163.30 MSRP: $248.40
You Save: $85.10 (35%)
1
ADD TO CART
Ships in 1-3 Business Days
  • Product Specifications

    BrandGenuine Nissan
    Lookup Code13028
    Manufacturer Part Number13028-JA00A
    Part DescriptionTiming Chain-Camchaft
    Item Dimensions6.5 x 3.2 x 1.1 inches
    Item Weight1.50 Pounds
    ConditionNew
    Fitment TypeDirect Replacement
    ManufacturerNissan
    SKU13028-JA00A
    WarrantyThis genuine Nissan part is guaranteed by Nissan's factory warranty.
    Shipping & ReturnShipping Policy Return Policy
    Warning: California’s Proposition 65
  • Vehicle Fitment

    Year Make Model Trim & Engine Important vehicle option details
    2007-2010 Nissan AltimaBase, Hybrid, S|4 Cyl 2.5LQR25DE
    2006-2014 Nissan FrontierS, SE, SV, XE|4 Cyl 2.5LQR25DE
    2007-2012 Nissan SentraSE-R, Spec V|4 Cyl 2.5LQR25DE

Customer Questions & Answers

Q:
Will this part fit my car? Posted by NissanPartsDeal Specialist
A:
You can Select Your Vehicle to check if 13028-JA00A fits your vehicle.
Posted by NissanPartsDeal Specialist
Q:
How to remove and install Timing Sprocket and Timing Chain on Nissan Sentra? Posted by Customer
A:
The timing system is sensitive a single mistake made will have severe repercussions on the engine; should not attempt this exercise if NOT well conversant with such repairs, if in any doubt seek other professionals' assistance. Review all work to verify all the components and functionality of the vehicle are accurate prior to attempting to start the engine. For some of the 2.5L engines, it is suggested that the engine be pulled for this process; however, servicing the timing chain assembly is feasible with the engine still in the vehicle. For 2.0L engines, there is an oil pump drive chain; 2.5L engines have the balance shaft drive chain and assembly that are not separable. First of all, turn the engine to be at the TDC for the first cylinder and then turn the car's negative terminal of the battery off. Left the nut of the right front wheel slightly loose, safely chocks the car with jackstands and take off the right front wheel. Also, disconnect the lower front fenders, take off the power window master switch, unbolt the inner splash shield of the fenderwell, also unscrew the engine oil, take off the coolant reservoir, as well as the alternator and the bracket for it. The main modification is to remove the valve cover and the intake manifold and then place some support that would hold the engine from the top. While this is done, also take out the lower oil pan and in case of the 2.5L models both the lower and upper oil pans. For 2.0L models, first and foremost, you have to take off the water pump pulley. Remove the electrical connector for the IVT control solenoid depending on the vehicle's model or 2.5L engines, next, take out the mounting bolt and solenoid of the timing chain cover. Turn out the bolts securing the IVT/camshaft sprocket cover to the timing chain main cover and then the upper chain guide. Camshaft sprocket timing should coincide with TDC number one and the crankshaft pulley should also be removed with its hole aligned to the rear of the engine without being able to turn. This is done to release the timing chain cover mounting bolts and the cover with special attention to noting the location of the bolts in the case of reassembly. Secure the tensioner in the fully collapsed state, take out the bolts and remove the tensioner assembly and finally the timing chain. While removing the camshaft sprocket bolts use and open-end wrench to hold the camshaft firmly. To dismantle the oil pump drive chain on the 2.0L engines, the tensioner bolts, the tensioner, guide, spacer of the drive, oil pump drive chain and crankshaft sprocket must be removed. For handle 2.5 L remove the balance shaft chain tensioner bolts, tensioner, guide, chain and crankshaft sprocket, balance shaft unit mounting bolts. Check the wear and tear on the camshaft, idler, and crankshaft sprockets; the chains and the chain guides if any. For installation, if it has been removed, on 2.0L engines reinstall the oil pump and on 2.5L engines install the balance shaft new bolts should be used and their torque should be in sequence. Fit the crankshaft sprocket and the oil pump/balance shaft drive chain in such a way that the outer links, which are of different color, engage the mating lugs. Replace the tensioner and make sure the alignment marks are matching, releasing the staking pin to apply pressure. Place the timing chain, sliding colored links into matching grooves on sprockets, timing chain, with guide and tensioner set into place and tightened. Smear RTV sealant on the timing chain cover, and finally fit it into place using the bolts and tighten them as per correct pattern. For 2.5L engines, use RTV sealant to the IVT/camshaft sprocket cover while assembling it. The rest of the process of the installation is the reversal of the listed steps of removal. This should be done prior to starting the engine and with the engine off; turn the crankshaft at least two times in opposite directions; if there is much friction, it is advised to look for problems with the engine. Connect the battery terminal and do relevant relearn operations.
Posted by NissanPartsDeal Specialist
Q:
How do you inspect the Timing Chain and Variable Timing Sprocket for wear and proper alignment during an engine overhaul on Nissan Altima? Posted by Customer
A:
The timing system is complex, and severe engine damage will occur if mistakes are made. Only highly experienced individuals should attempt this procedure, and if there is any uncertainty, consulting an expert is advised. Double-check all work to ensure correctness before starting the engine. Begin by having a qualified air conditioning shop recover the refrigerant from the air conditioning system, then relieve the fuel system pressure and disconnect the negative battery terminal. Block the rear wheels, set the parking brake, raise the front of the vehicle, and support it securely on jackstands. Drain the cooling system, power steering fluid, and engine oil, then remove the power steering fluid reservoir, top and bottom engine covers, right inner fender splash shield, and front air inlet duct. Remove the intake manifold collector, valve covers, and dipstick, and position the number one piston at TDC on the compression stroke. Remove the drivebelt, upper radiator hose, lower radiator hose, coolant reservoir, cooling fan assembly, starter, power steering pump, air conditioning compressor, alternator and its bracket, and crankshaft pulley, ensuring the crankshaft does not rotate during removal. Disconnect wiring from the oil pressure switch and valve timing control wiring harness, label and disconnect any other interfering wiring and hoses, then remove the bolts from the IVT covers in reverse of the tightening sequence. Remove the drivebelt tensioner, air conditioning idler pulley and its bracket, and the bolts of the front timing chain cover in reverse of the tightening sequence, prying the cover off using the slots at the top. Remove the O-ring below each intake camshaft sprocket, confirm the number one piston is still at TDC, relieve tension on the primary timing chain, and lock the primary tensioner in place. Remove the primary timing chain tensioner, tensioner pivot arm/chain guide, and upper timing chain guides, then depress and lock the secondary timing chain tensioners. Remove the camshaft sprocket bolts, disengage the primary timing chain from the sprockets, and mark the camshaft sprockets before removing them along with the secondary timing chains. Remove the crankshaft sprocket and lower timing chain guide, then inspect the camshaft, water pump, and crankshaft sprockets for wear, as well as the chains and chain guides. Before starting the engine, carefully rotate the crankshaft by hand through at least two full revolutions, checking for resistance. Install the crankshaft sprocket and lower timing chain guide with the mark facing up, verify the correct timing chains, and reinstall secondary tensioners if removed. Position the camshafts correctly, install secondary timing chains and sprocket assemblies, and ensure timing marks are aligned. Install the primary timing chain, upper timing chain guides, primary tensioner arm/chain guide, and timing chain tensioner assembly, confirming the number one piston is still at TDC and timing marks are aligned before removing the stopper pin from the primary timing chain tensioner. Tighten the camshaft sprocket bolts, remove old sealant from the timing chain cover, install new O-rings, apply RTV sealant to the timing chain cover sealing surfaces, and install the cover and bolts in their original locations, tightening them in the recommended sequence. Install new O-rings in the IVT orifices and apply RTV sealant to the variable valve timing actuator covers, placing them in position and tightening the bolts. The remainder of the installation follows the reverse order of removal, adhering to sealant manufacturer's recommendations for assembly and curing times. Fill the crankcase with oil, install a new filter, refill the cooling system, reconnect the battery, and perform necessary re-learn procedures. Timing chain noise may be apparent after this procedure, which is normal and should subside as air bleeds out of the primary timing chain tensioner; if the noise persists, run the engine at 3,000 rpm until it diminishes.
Posted by NissanPartsDeal Specialist
Q:
How should the RTV sealant be applied during reinstallation for the 2008 Nissan Altima? Posted by Customer
A:
Apply RTV sealant to the timing chain cover and IVT/camshaft sprocket cover before reinstalling them, tightening bolts in the correct sequence.
Posted by NissanPartsDeal Specialist
If you have any questions about this product, please don't hesitate to ask us. We will be happy to help you!

Genuine Nissan Part 13028-JA00A, the Right Choice

To ensure reliability, purchase Nissan part # 13028-JA00A Chain-Timing CAMSHAFT. It is sometimes referred to as Nissan Timing Chain. OEM parts are the #1 choice in terms of quality. Crafted by Nissan, they follow rigorous factory specs and go through the demanding quality control processes during manufacturing. This part fits 2007-2010 Nissan Altima, 2006-2014 Nissan Frontier, 2007-2012 Nissan Sentra.

NissanPartsDeal.com is a leading supplier of genuine Nissan parts and accessories such as Nissan 13028JA00A Chain-Timing CAMSHAFT. Welcome to our vast selection of competitively-priced genuine Nissan parts available online. Each OEM Nissan part we provide is backed by a manufacturer's warranty and is subject to a stress-free return policy. Place your order now and receive your parts quickly, shipped directly to your doorstep.

Why choose Nissan Parts Deal

  • Dedicated Service

    Your complete satisfaction is our #1 goal

  • Lowest Prices

    Best deals on genuine OE parts from dealerships

  • Fast Delivery

    Orders are processed and delivered promptly