Contact Us: Live Chat or 1-888-726-6993
My Garage
My Account
My Cart
Make sure this part fits your vehicle

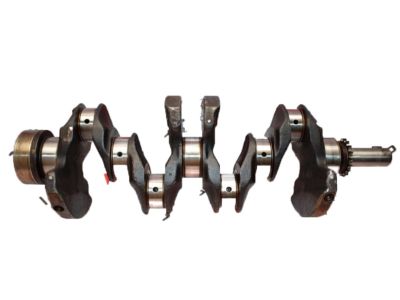
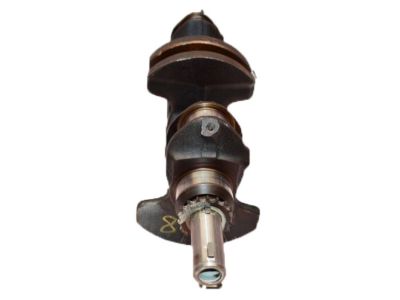
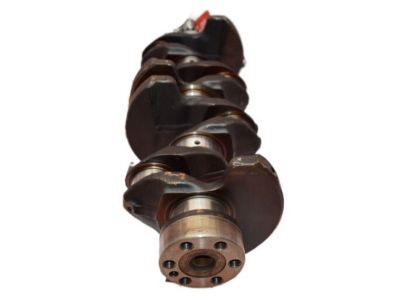
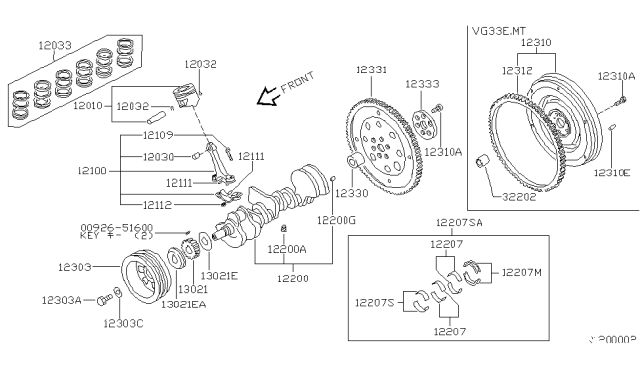
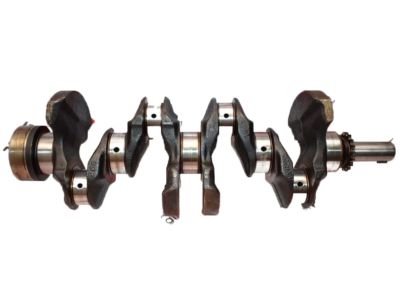
Nissan 12200-F4000 CRANKSHAFT Assembly

1989-2004 Nissan 12200F4000

Nissan 12200-F4000 CRANKSHAFT Assembly
  • Part Description
    CRANKSHAFT Assembly
  • Lookup Code
    12200
  • Replaced By
    (MultiSupersession)
  • Replaces
    12200-F4500, 12200-86G00
  • Manufacturer
    Nissan
  • Manufacturer's Notes
    This part is discontinued.
Customer Questions & Answers
  • Product Specifications

    BrandGenuine Nissan
    Lookup Code12200
    Manufacturer Part Number12200-F4000
    Part DescriptionCRANKSHAFT Assembly
    Other NamesCrankshaft
    Manufacturer NoteNMX
    Item Dimensions20.4 x 6.2 x 5.3 inches
    Item Weight15.60 Pounds
    ConditionNew
    Fitment TypeDirect Replacement
    Replaces12200-F4500, 12200-86G00
    ManufacturerNissan
    SKU12200-F4000
    WarrantyThis genuine Nissan part is guaranteed by Nissan's factory warranty.
    Shipping & ReturnShipping Policy Return Policy
    Warning: California’s Proposition 65
  • Vehicle Fitment

    Year Make Model Trim & Engine Important vehicle option details
    1998-2004 Nissan FrontierSE, STD, XE|4 Cyl 2.4LKA24DE
    1989-1994 Nissan Hardbody Pickup (D21)DX|4 Cyl 2.4LKA24E
    1995-1997 Nissan Hardbody Pickup (D21U)Long Body XE, SE, Short Body XE, STD, XE|4 Cyl 2.4LKA24E
    2000-2003 Nissan XterraXE|4 Cyl 2.4LKA24DE

Customer Questions & Answers

Q:
Will this part fit my car? Posted by NissanPartsDeal Specialist
A:
You can Select Your Vehicle to check if 12200-F4000 fits your vehicle.
Posted by NissanPartsDeal Specialist
Q:
How do you properly reassemble and install the crankshaft during the engine reassembly process on Nissan Xterra? Posted by Customer
A:
The reassembly of an engine must begin with thorough cleaning, inspection, and repair or reconditioning of the engine block and crankshaft. The engine should be positioned such that the crankcase faces upwards on the stand. The brace assembly must be lifted out of the bearing cap through removal of main bearing cap bolts and ensure no harm comes to bearing surfaces. If it exists, take out original bearing inserts from both main caps and block and clean their surfaces using a lint free cloth. Keep the surfaces precisely clean. For the following check for main bearing oil clearance, place new main bearing inserts into main bearing saddles in block ensuring proper alignment with oil holes in a block. Bear in mind that bearings should not be hammered into position as this may damage bearing faces. Place the flanged thrust bearing without lubrication either behind it or at its front face depending on the kind of engine (fourth cap and saddle for 3.3L engines) (third cap and saddle for 2.4L and 3.5L engines). Ensure cleanliness of both these surfaces as well as those on the crankshaft main bearing journals. Once cleaned, laydown the crankshaft within the primary bearings at their places relative to each other Next important step is to use Plastigage for checking main bearing oil clearance on each crankshaft journal.Remove any traces of Plastigage from the journals before installing them which should face towards drivebelt end Install brace assemblies with caps by tightening bolts until Plastigage is not disturbed in accordance with arrow directions Rotate gradually tightening main-bearing cap assembly bolts three times starting from centre going outwards avoiding turning over crankshaft After tightening all these bolts to required torque remove caps carefully leaving Plastigage untouched Measure crushed width against scale on envelope to determine if specified value meets up with clearance specified If not ensure cleanliness then think about probably changing such things like different types of inserts used Carefully remove all Plastigage material traces from bearing faces and main bearing journals The crankshaft should be put into the block with clean caps and then the cap bolts tightened to torque values Aligning main bearing and crankshaft thrust surfaces by gently tapping ends of the crankshafts After re-tightening all main-bearing cap bolts, rotate crankshaft by hand in order to check for any binding Verify the amount of endplay in the crankshaft using feeler gauge or dial indicator, if new bearings are installed and thrust faces are good Finally, secure it to block when installing a new seal and retainer.
Posted by NissanPartsDeal Specialist
Q:
What are the prerequisites for crankshaft removal for the 2003 Nissan Xterra? Posted by Customer
A:
The prerequisites for crankshaft removal include the removal of the flywheel/driveplate, crankshaft pulley, timing belt (for 3.3L engines) or timing chain (for 2.4L and 3.5L engines), camshaft, crankshaft sprockets, oil pan, oil pump, and piston/connecting rod assemblies. The rear main oil seal retainer must also be unbolted and separated from the block.
Posted by NissanPartsDeal Specialist
Q:
What are the prerequisites for crankshaft removal for the 2002 Nissan Frontier? Posted by Customer
A:
The prerequisites for crankshaft removal include the removal of the flywheel/driveplate, crankshaft pulley, timing belt (for 3.3L engines) or timing chain (for 2.4L and 3.5L engines), camshaft, crankshaft sprockets, oil pan, oil pump, and piston/connecting rod assemblies. The rear main oil seal retainer must also be unbolted and separated from the block.
Posted by NissanPartsDeal Specialist
See expert answers on similar Crankshaft
Q:
What should be checked on the crankshaft for wear and damage for the 2000 Nissan Xterra? Posted by Customer
A:
Check the main and connecting rod bearing journals for uneven wear, scoring, pits, and cracks. Additionally, check the rest of the crankshaft for cracks and other damage.
Posted by NissanPartsDeal Specialist
Q:
Where should the measurement be taken on the journal to determine if it is tapered for the 1999 Nissan Frontier? Posted by Customer
A:
Take the measurement at each end of the journal, near the crank throws, to determine if the journal is tapered.
Posted by NissanPartsDeal Specialist
Q:
How should you install the main bearing caps, and what precautions should be taken during tightening for the 2000 Nissan Frontier? Posted by Customer
A:
Install the main bearing caps with the arrows facing the drivebelt end of the engine. Gradually tighten the main bearing cap assembly bolts in three steps, starting from the center and moving outward. Avoid rotating the crankshaft during this process.
Posted by NissanPartsDeal Specialist
If you have any questions about this product, please don't hesitate to ask us. We will be happy to help you!

Genuine Nissan Part 12200-F4000, the Right Choice

To ensure reliability, purchase Nissan part # 12200-F4000 CRANKSHAFT Assembly. It is sometimes referred to as Nissan Crankshaft. OEM parts are the #1 choice in terms of quality. Crafted by Nissan, they follow rigorous factory specs and go through the demanding quality control processes during manufacturing. This part fits 1998-2004 Nissan Frontier, 1989-1994 Nissan Hardbody Pickup (D21), 1995-1997 Nissan Hardbody Pickup (D21U), 2000-2003 Nissan Xterra.

NissanPartsDeal.com is a leading supplier of genuine Nissan parts and accessories such as Nissan 12200F4000 CRANKSHAFT Assembly. Welcome to our vast selection of competitively-priced genuine Nissan parts available online. Each OEM Nissan part we provide is backed by a manufacturer's warranty and is subject to a stress-free return policy. Place your order now and receive your parts quickly, shipped directly to your doorstep.

Why choose Nissan Parts Deal

  • Dedicated Service

    Your complete satisfaction is our #1 goal

  • Lowest Prices

    Best deals on genuine OE parts from dealerships

  • Fast Delivery

    Orders are processed and delivered promptly