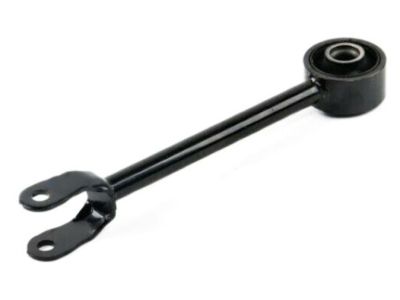
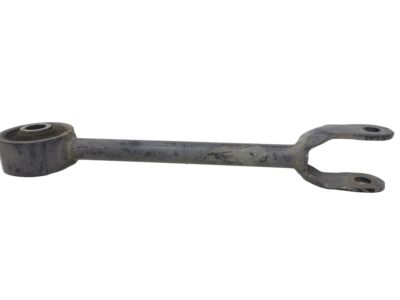
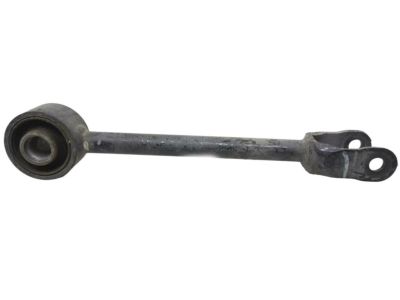
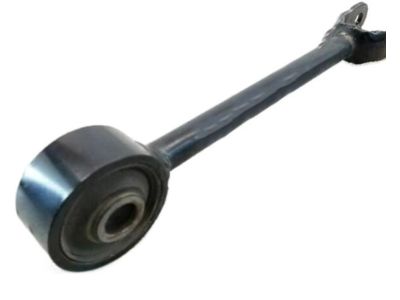
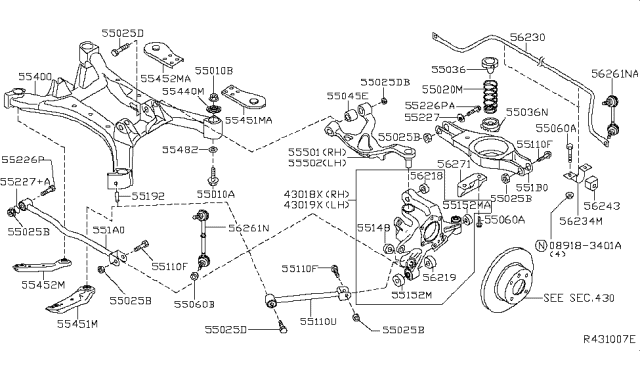
Loosen the rear wheel lug nuts, then raise the rear of the vehicle and support it securely on jackstands before removing the wheel. Remove the coil spring, followed by the lower arm-to-knuckle mounting bolt/nut, and take out the lower rear suspension arm. For installation, raise the lower suspension arm with a floor jack to normal ride height and tighten the suspension arm bolt/nuts to the specified torque, ensuring the marks on the adjusting cam and subframe are aligned. Tighten the wheel lug nuts to the specified torque. Support the rear lower suspension arm with a floor jack under the coil spring pocket, keeping the jack in place until the arm is reinstalled. Mark the relationship of the adjusting cam to the subframe before loosening the inner pivot bolt, then remove the lower front suspension arm-to-subframe and lower front suspension arm-to-knuckle mounting bolt/nut, and take out the arm. For installation, raise the lower suspension arm with a floor jack to normal ride height and tighten the suspension arm bolt/nuts to the specified torque, ensuring alignment of the marks on the adjusting cam and subframe, followed by tightening the wheel lug nuts. Raise the vehicle and support it securely on jackstands, then remove the rear wheel speed sensors and the rear wheel brake calipers, hanging them out of the way with wire to avoid stress on the hoses, and remove the brake discs. Disconnect the parking brake cables from the knuckles, remove the nuts from the lower shock absorber mounts, and take out the lower rear suspension arms. Remove the cotter pins and nuts from the upper suspension arm balljoint, disconnect the radius rods from the subframe, and remove the front lower suspension arms. Remove the knuckles and the stabilizer bar, then disconnect the wiring harness from the rear subframe and upper arms. Place two floor jacks under the rear subframe for secure support, remove the subframe mounting bolts, and carefully lower the rear subframe until it is clear of the vehicle body. Remove the stabilizer bar brackets from the upper suspension arms, then take out the upper suspension arm mounting nuts and bolts, followed by the upper suspension arms. For installation, reverse the removal steps, ensuring to tighten the ball/joint stud nut to the specified torque, raise the lower suspension arm with a floor jack to normal ride height, and tighten the pivot bolt nuts to the specified torque, followed by tightening all other fasteners to their respective torques.
Posted by NissanPartsDeal Specialist