×
- Hello
- Login or Register
- Quick Links
- Live Chat
- Track Order
- Parts Availability
- RMA
- Help Center
- Contact Us
- Shop for
- Nissan Parts
- Nissan Accessories

My Garage
My Account
Cart
Genuine Nissan Rogue Crankshaft
Crank Shaft- Select Vehicle by Model
- Select Vehicle by VIN
Select Vehicle by Model
orMake
Model
Year
Select Vehicle by VIN
For the most accurate results, select vehicle by your VIN (Vehicle Identification Number).
8 Crankshafts found
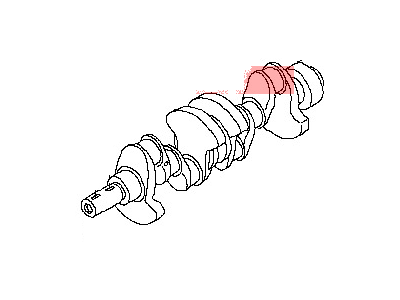
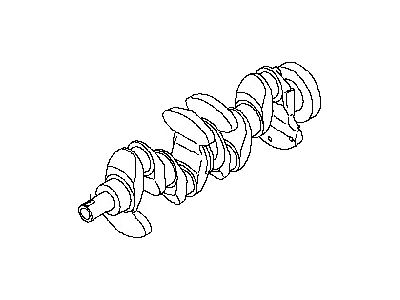
Nissan Rogue CRANKSHAFT Assembly
Part Number: 12201-9HP0B$1166.03 MSRP: $1646.93You Save: $480.90 (30%)Ships in 1-3 Business DaysNissan Rogue CRANKSHAFT Assembly
Part Number: 12201-JA03A$1302.87 MSRP: $1577.33You Save: $274.46 (18%)Ships in 1-3 Business DaysNissan Rogue CRANKSHAFT Assembly
Part Number: 12201-3TA0A$1302.87 MSRP: $1577.33You Save: $274.46 (18%)Ships in 1-3 Business DaysNissan Rogue CRANKSHAFT Assembly
Part Number: 12201-1VA0A$1197.58 MSRP: $1449.86You Save: $252.28 (18%)Ships in 1-3 Business DaysNissan Rogue CRANKSHAFT Assembly
Part Number: 12201-9HP0C$658.04 MSRP: $1398.70You Save: $740.66 (53%)Ships in 1-2 Business DaysNissan Rogue CRANKSHAFT Assembly
Part Number: 12201-9HP0D$546.34 MSRP: $771.67You Save: $225.33 (30%)Ships in 1-3 Business DaysNissan Rogue CRANKSHAFT Assembly
Part Number: 12201-3TA1A$994.79 MSRP: $1405.07You Save: $410.28 (30%)Ships in 1-3 Business DaysNissan Rogue CRANKSHAFT Assembly
Part Number: 12201-9HP0A$1026.05 MSRP: $1449.22You Save: $423.17 (30%)
Nissan Rogue Crankshaft
If you need any OEM Nissan Rogue Crankshaft, feel free to choose them out of our huge selection of genuine Nissan Rogue Crankshaft. All our parts are offered at unbeatable prices and are supported by the manufacturer's warranty. In addition, we offer quick shipping to have your parts delivered to your door step in a matter of days.
Nissan Rogue Crankshaft Parts Questions & Experts Answers
- Q: How can the crankshaft be removed from the engine after it has been taken out of the Nissan Rogue?A:This necessarily entails in removing the engine from the car, and if you still talks about the crankshaft then it is presupposed that other parts including the flywheel, crankshaft pulley, timing chain, oil pan, oil pump, balance shaft, oil filter and piston/connecting rod assemblies have been removed. To commence with, using a dial indicator slid it in line with the crankshaft, setting it to zero by prying it to the Rear, then to the Front to acquire the reading, which should normally range between 0.0030.010 (0.076 to 0.254 mm). If the endplay is greater than this range, there will be wear present at the thrust washer/bearing assembly. If one cannot use a dial indicator, then one can use feeler gauges in order to clearances From: Liberate equally with the ultimate intention of removing the main bearing cap/bedplate bolts to the point where they might be removed manually, while insisting for new bolts to be bought because the old ones should not be reused. Support the main bearing caps or the bedplate assembly above the cylinder block and strike them lightly with a soft-face hammer, when you wish to remove the bearing inserts, do not drop them. Carefully raise the crankshaft out of the engine, preferably with the help of another man because it is quite heavy. Replacing the main bearing cap assembly to the engine block and ensure that the arrow is positioned at the front side. At installation be sure that the engine block and crankshaft are is clean and inspected andnbsp;free from any form of defects. Turn it such that the bottom is facing upwards, take off the primary end bearing cap and clean the bearings' seating. Replace new upper and new lower main bearing inserts and make sure that all the oil holes are lined up and do not mar the bearing faces. Ensure that the oil holes in the crankshaft are free from debris before finally laying the crankshaft in place, sliding the thrust washers in between journal no 3. Prior to the fixed installation, check the amount of clearance of the main bearing oil using Plastigage and see whether it is within the set standards. Though, if the clearance is wrong then cleanliness should be checked and if required other bearing inserts should be considered. Once all the Plastigage has been scraped off, clean both bearing insert mating surfaces and apply a layer of some lightweight oil on the area that is to come in contact with the crank. Realign the crankshaft into its original position, degauze the bearing insert faces and paint with lubricating oil. Depress the crankshaft thrust washer which should have grooves oriented outside, proceed and apply RTV sealant into the bedplate sealing surface, fix the bedplate into position on the crankshaft and cylinder block. Coat threads of bolts with clean engine oil, tighten bolts to hand tightness and then go step by step to tighten them to a certain torque. Clean crankshaft end play with contact cleaner, reinstall the new connecting rod big end bearings, and check/dial in the crank with torque 50 in/lbs or less if the crank binds when rotating it. Last of all, it will be necessary to set in the new rear main oil seal.


