×
- Live Chat
- 1-888-726-6993
My Garage
My Account
Cart
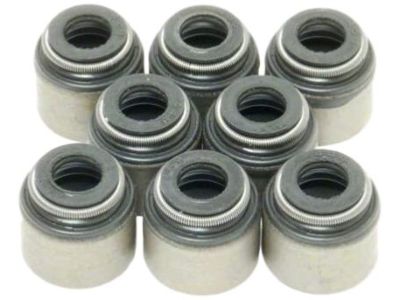
Genuine Nissan Xterra Valve Stem Oil Seal
Engine Valve Seal- Select Vehicle by Model
- Select Vehicle by VIN
Select Vehicle by Model
orMake
Model
Year
Select Vehicle by VIN
For the most accurate results, select vehicle by your VIN (Vehicle Identification Number).
3 Valve Stem Oil Seals found
Nissan Xterra Seal Valve
Part Number: 13207-2B500$5.06 MSRP: $6.97You Save: $1.91 (28%)Ships in 1-2 Business Days
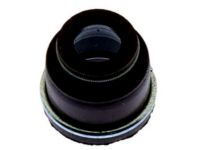
Nissan Xterra Seal-Oil,Valve
Part Number: 13207-3Z000$4.71 MSRP: $6.48You Save: $1.77 (28%)Ships in 1-3 Business Days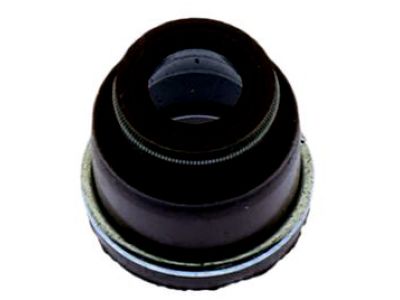
Nissan Xterra Seal-Oil,Valve
Part Number: 13207-0B010$6.28 MSRP: $8.65You Save: $2.37 (28%)Ships in 1-2 Business Days
Nissan Xterra Valve Stem Oil Seal
If you need any OEM Nissan Xterra Valve Stem Oil Seal, feel free to choose them out of our huge selection of genuine Nissan Xterra Valve Stem Oil Seal. All our parts are offered at unbeatable prices and are supported by the manufacturer's warranty. In addition, we offer quick shipping to have your parts delivered to your door step in a matter of days.
Nissan Xterra Valve Stem Oil Seal Parts Questions & Experts Answers
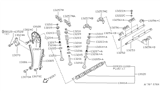
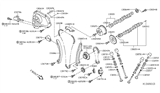
- Q: How to replace broken valve springs or defective valve stem seals without removing the cylinder heads on 3.3L V6 Nissan Xterra?A: If you want to replace damaged or worn out valve stem seals as well as broken valve springs without removing the Cylinder Heads,Begin by taking off the Rocker Arm assembly then the valve cover (s), and finally, you can remove the lifter guide assembly. Unscrew the spark plug from the affected cylinder (or all spark plugs if replacing all valve stem seals) and make sure the piston in that cylinder is at Top Dead Center on compression stroke moving through firing order sequence where necessary. Screw a long adapter into the spark plug hole and connect it to compressed air source. Introduce compressed air into the cylinder as well as place shop rags around each of the valves to prevent debris from falling into engine. Use pliers or magnet to remove them after releasing the valve keepers and compressing spring with a valve spring compressor. Ensure valves are kept in place using air pressure because poor face or seat conditions may cause air leaks. Take off the shield, spring retainer, valve spring and finally, remove the valve stem seal. Before releasing air pressure, secure its valve stem by using a rubber band or tape so that it will not slip down into combustion chamber. In case of binding between guide and stem, head should be removed for repair since it indicates either a damaged guide or valve which is extremely bad news when things like this happen inside an engine in motion. Reapply pressure again which would hold close both exhaust and intake valves, while taping is released along with booting of oils on new stems of valves before installing new ones too into guides meant for each cylinder's own sets of valves also being pushed down according to acceptable depth by tapping such until they become fully seated with their respective shoulders against top surface of cylinder head. The tool used for this purpose can be a socket extended deep inside of engine upon applying light blows with a hammer so that it fits up tightly just within limits allowed by configurations drawn up by manufacturers for an intake valve seal. Place exhaust seals in as far as just internal fingers will allow as soon as you see them ready to go home to the bottom of their respective counterbores. Be careful enough not to mix up intake and exhaust seals. Install the inner and outer springs with closely-wound coils against the cylinder head, then put the valve spring retainer on and finally, hold keepers in groove gently applying some grease to help keep them in place temporarily at least until pressure is off from such a tool of theirs for retention purposes. Remove pressure from the spring tool and ensure that keepers have been seated correctly. Disconnect air hose and adapter, install lifters assembly, rocker arm assembly, valve cover(s), spark plug(s) and wires. Start engine; check oil leaks as well as unusual sounds coming from valve cover area.
Related Nissan Xterra Parts
 Nissan Xterra Fuel Injector O-Ring
 Nissan Xterra Fuel Pump
 Nissan Xterra Fuel Filter
 Nissan Xterra Fuel Level Sensor
 Nissan Xterra Fuel Pressure Regulator
 Nissan Xterra Fuel Filler Neck
 Nissan Xterra Fuel Door Hinge
 Nissan Xterra Fuel Filler Hose
 Nissan Xterra Fuel Line Clamps
Browse by Year
2015 Valve Stem Oil Seal 2014 Valve Stem Oil Seal 2013 Valve Stem Oil Seal 2012 Valve Stem Oil Seal 2011 Valve Stem Oil Seal 2010 Valve Stem Oil Seal 2009 Valve Stem Oil Seal 2008 Valve Stem Oil Seal 2007 Valve Stem Oil Seal 2006 Valve Stem Oil Seal 2005 Valve Stem Oil Seal 2004 Valve Stem Oil Seal 2003 Valve Stem Oil Seal 2002 Valve Stem Oil Seal 2001 Valve Stem Oil Seal 2000 Valve Stem Oil Seal